My Blender Tutorial Experience
I recently dove into 3D modeling with Blender, a free yet insanely powerful tool. My goal? Prepare for future Unity projects and finally get comfortable creating things from scratch in 3D. To kick things off, I followed two YouTube tutorials:
Understanding the Basics
Before starting, I clarified essential 3D modeling concepts.
| Term | Description |
|---|---|
Mesh | A combination of vertices (points), edges (lines), faces (polygons), or any combination of these. |
Geometry | Any 3D object with position data, including meshes, curves, instances, volumes, etc. |
Instance | A duplicate of an object sharing the same underlying data as the original. |
Shader | A program controlling how light interacts with a surface, affecting color, reflection, transparency, and emission. In Blender, it’s often used interchangeably with material. |
💡 Why it matters: Blender can feel like a maze at first. Understanding meshes, modifiers, and basic geometry gave me a clear roadmap—I suddenly knew what to click, move, and tweak.
Tools & Resources
- Blender: Download v4.4
- YouTube Tutorials:
Essential Shortcuts
| Shortcut | Action |
|---|---|
Middle Mouse | Orbit around scene |
Shift + Middle Mouse | Pan view |
Mouse Wheel Scroll | Zoom in/out |
Tab | Switch between Object/Edit Mode |
N | Toggle Sidebar |
For Object Mode:
| Shortcut | Action |
|---|---|
T | Toggle Toolbar |
G | Move objects |
R | Rotate objects |
S | Scale (resize) objects |
Shift + A | Add object |
Alt (when adding) | Add object in perfect form (e.g., perfect cube or triangle) |
Ctrl + L | Link properties between objects |
💡 Tip: For more shortcuts, check Blender’s Keymap Documentation.
Recommended Setup
-
Go to
Edit > Preferences > Interfaceand adjust the Resolution Scale
💡 Why: Makes Blender easier to work with depending on your screen size. -
Check your GPU under
System > Cycles Render Devices > CUDA
💡 Why: Ensures hardware acceleration for faster rendering. -
Increase Undo Steps to 100 in
System > Memory & Limits
💡 Why: Allows more flexibility when correcting mistakes.
Step-by-Step Experience
Tutorial 1: Blender Beginner Tutorial
This tutorial covered the fundamentals:
- Navigating Blender’s viewport
- Differences between Edit Mode and Object Mode
- Building a simple object step by step
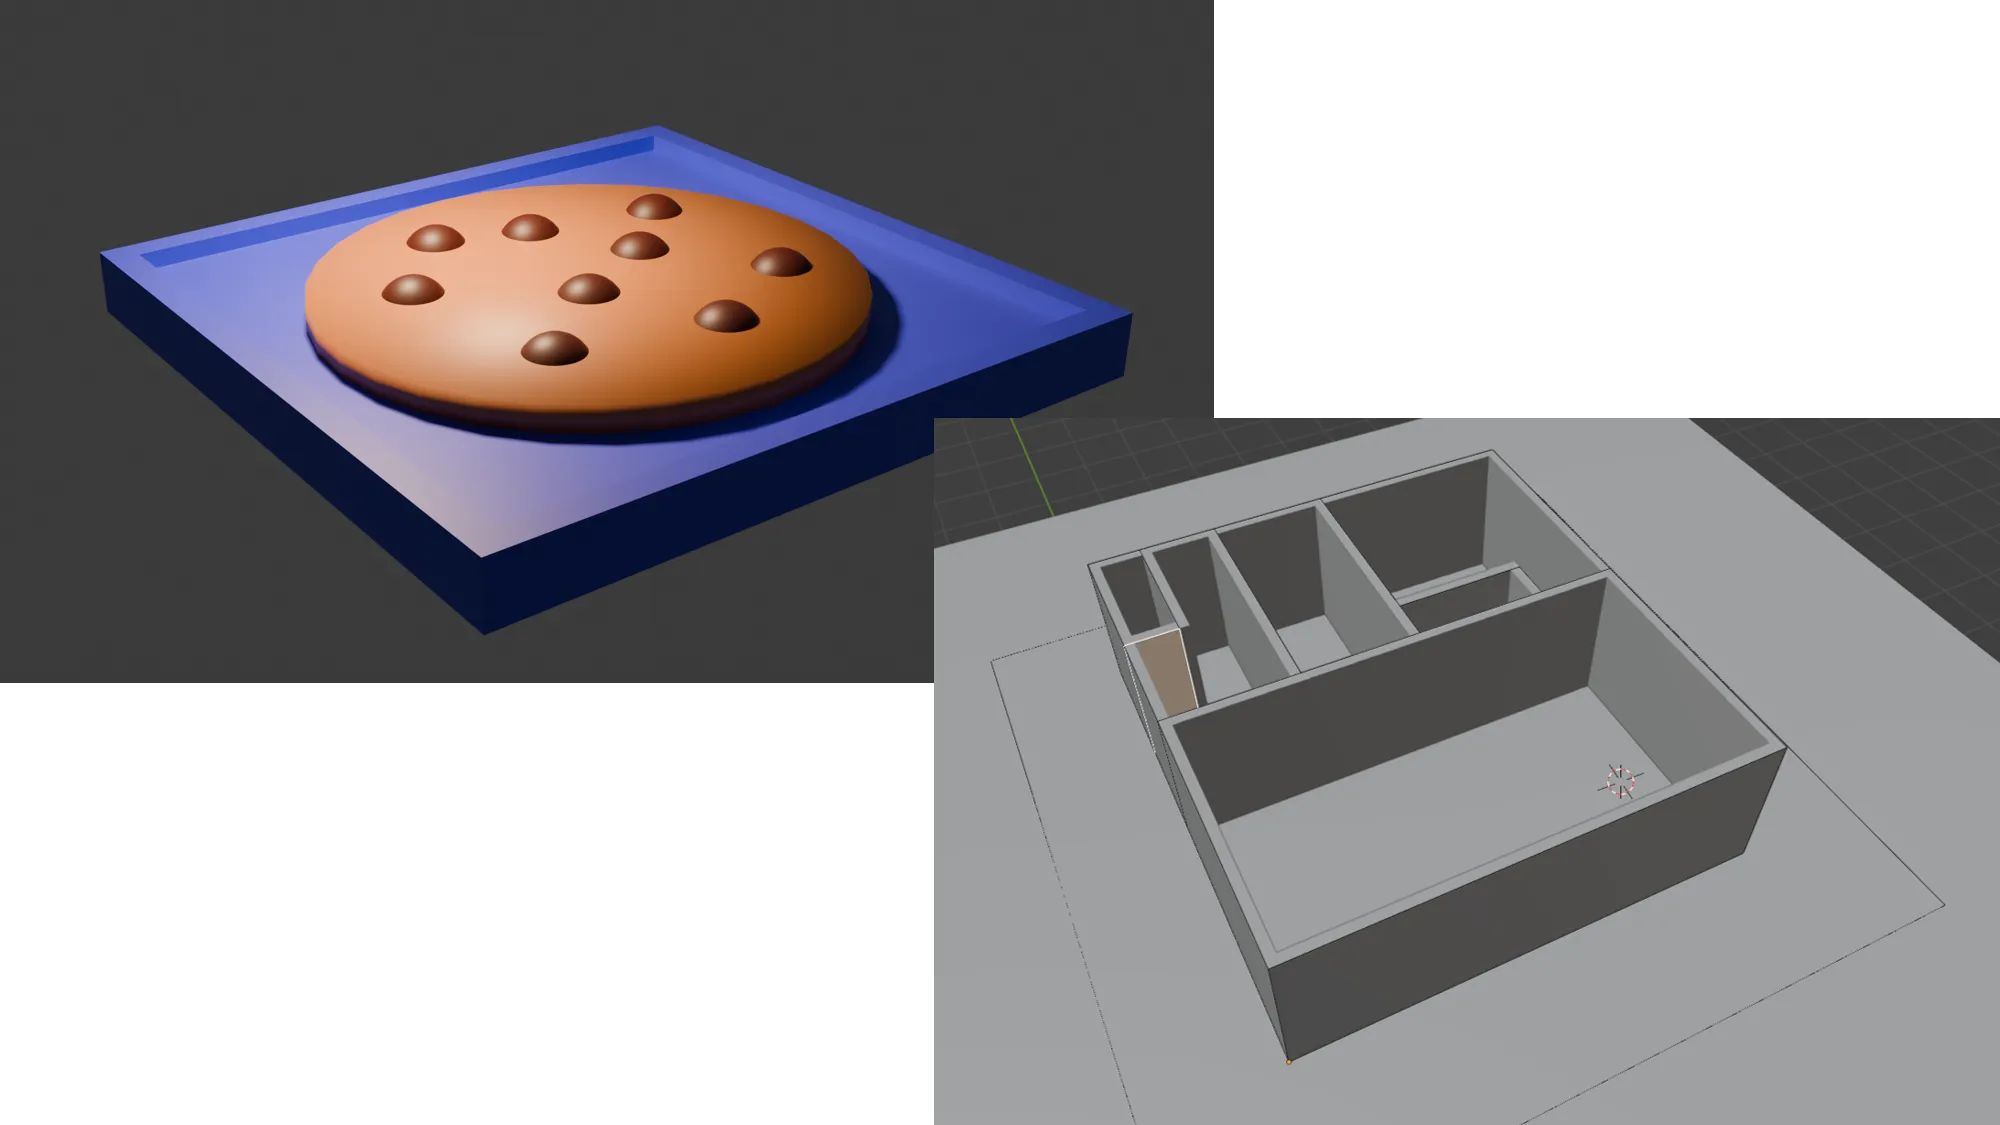
1. Cookie Base
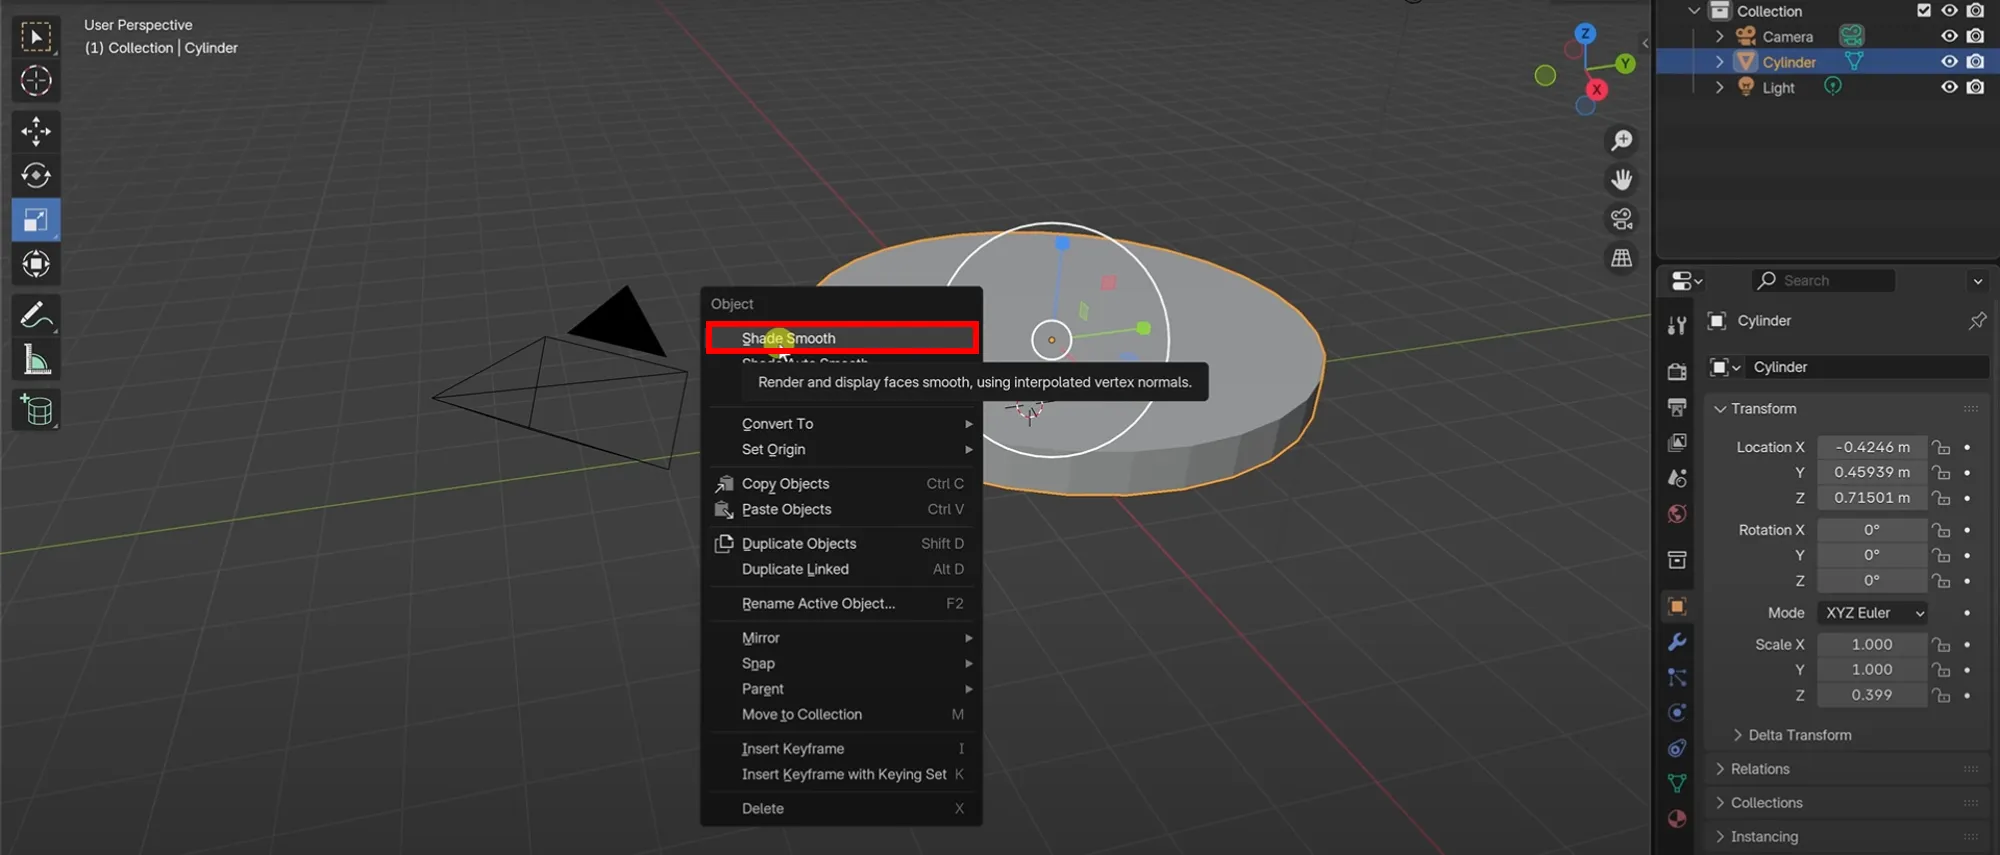
- Add a Cylinder (
Shift + A > Mesh > Cylinder). - Scale (
S) to flatten into a cookie shape. - Right-click →
Shade Smoothfor a softer look.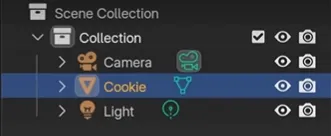
- Rename it Cookie in the Outliner to stay organized.
2. Chocolate Chips

- Add a UV Sphere (
Shift + A > Mesh > UV Sphere) - Scale down (
S) to chip size - Position using Move (
G)
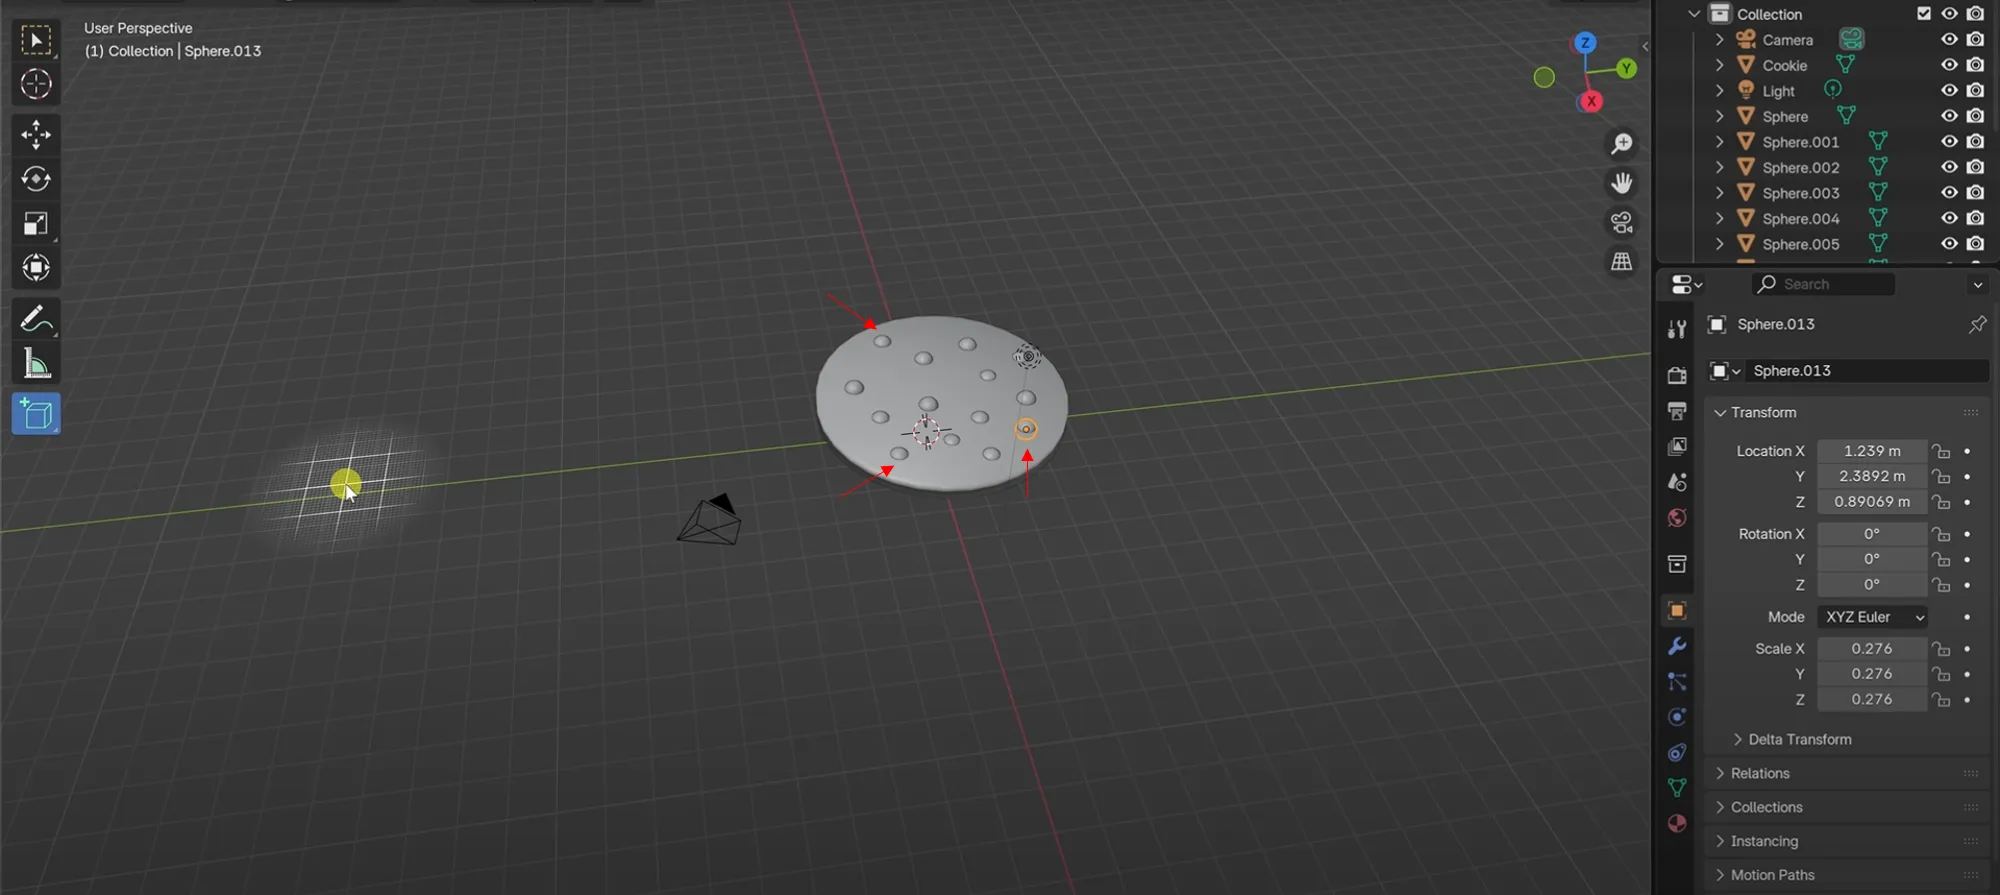
- Duplicate chips (
Shift + D) and place around the cookie
3. Tray
- Add a Cube (
Shift + A > Mesh > Cube) - Scale and move to sit under cookie 1insetFace
- Enter Edit Mode (
Tab), select top face, use Inset Faces (I)
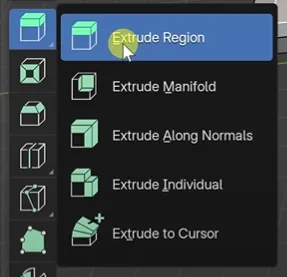
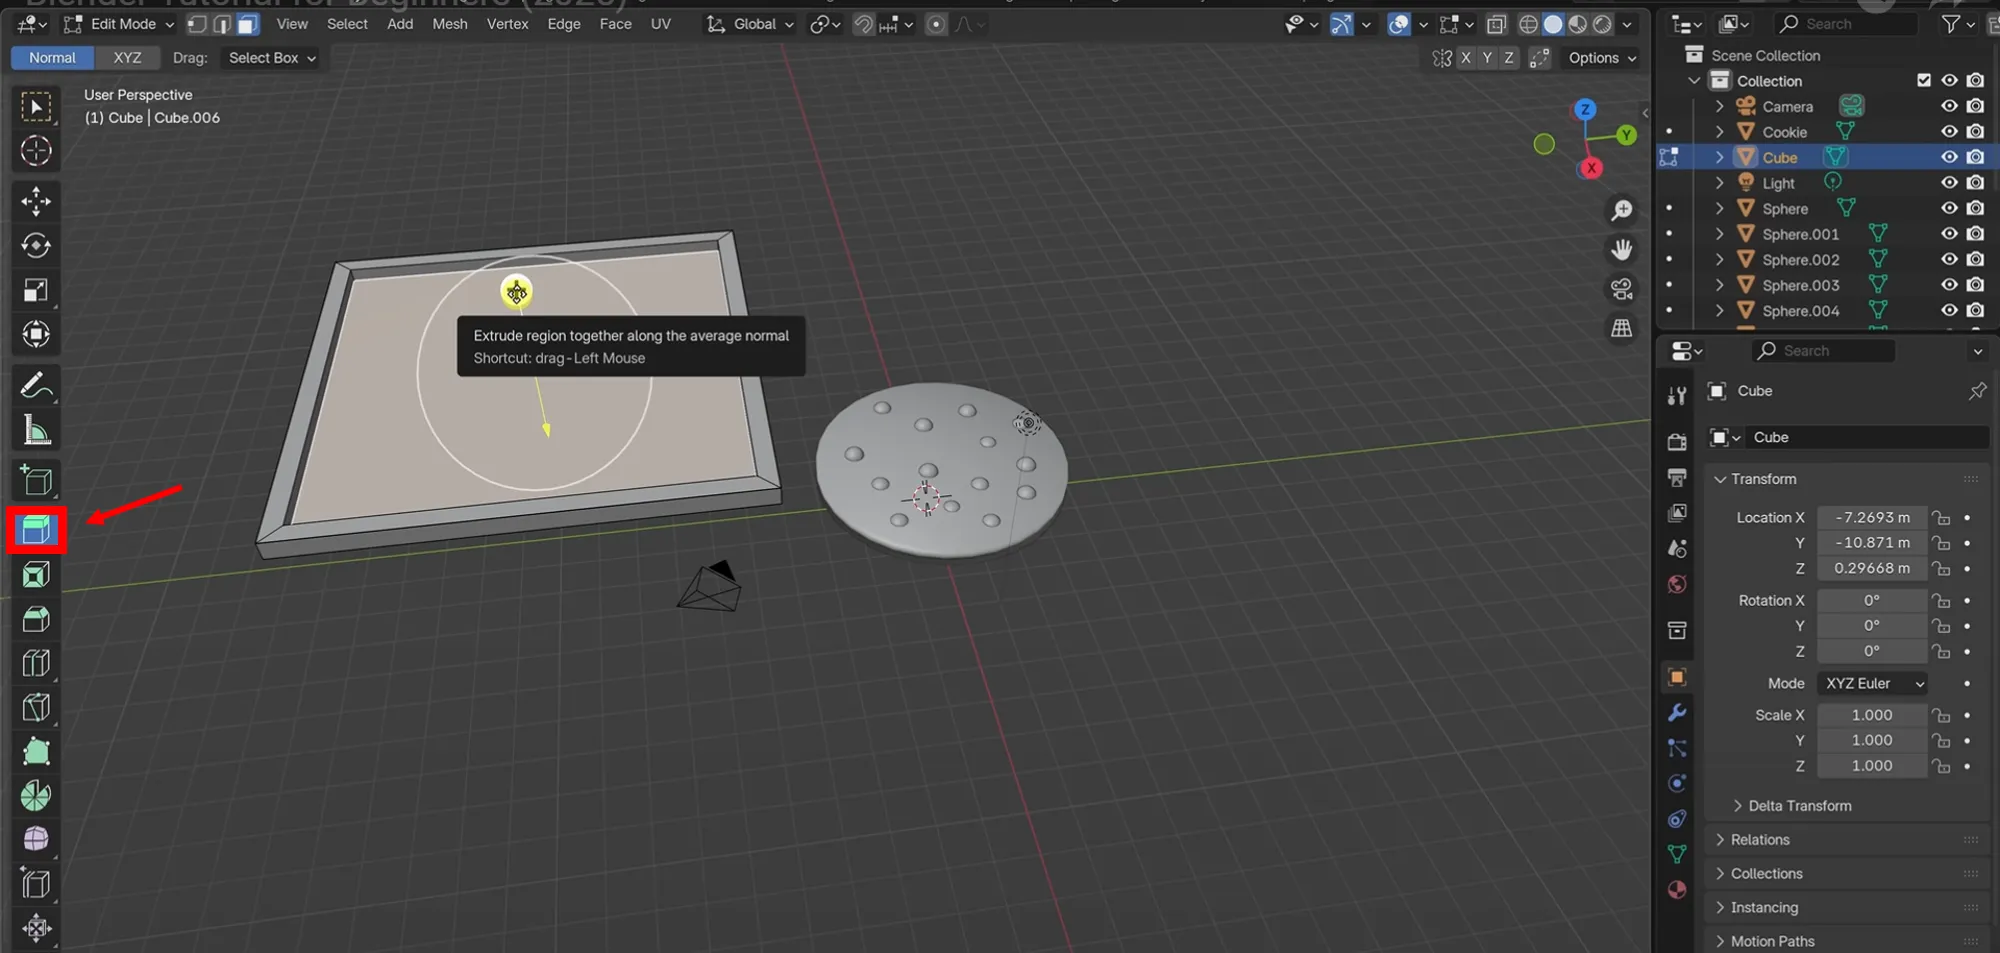
- Extrude inner face down (
E) to create tray depth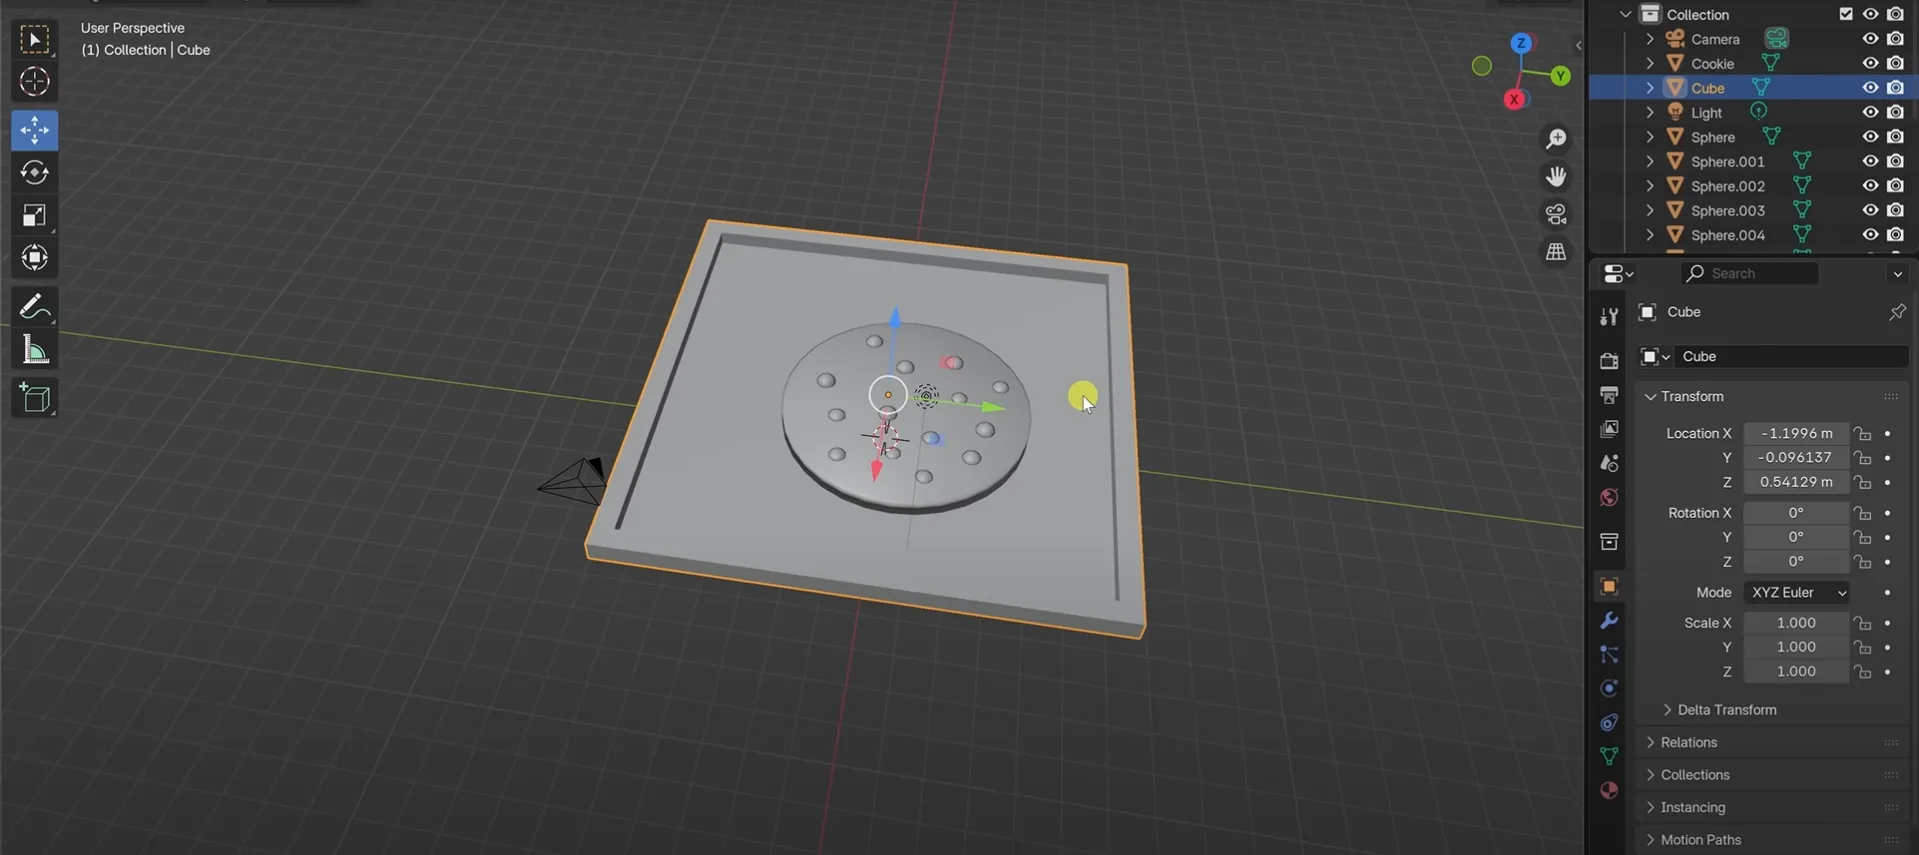
- Move the tray under the cookie.
4. Materials & Colors
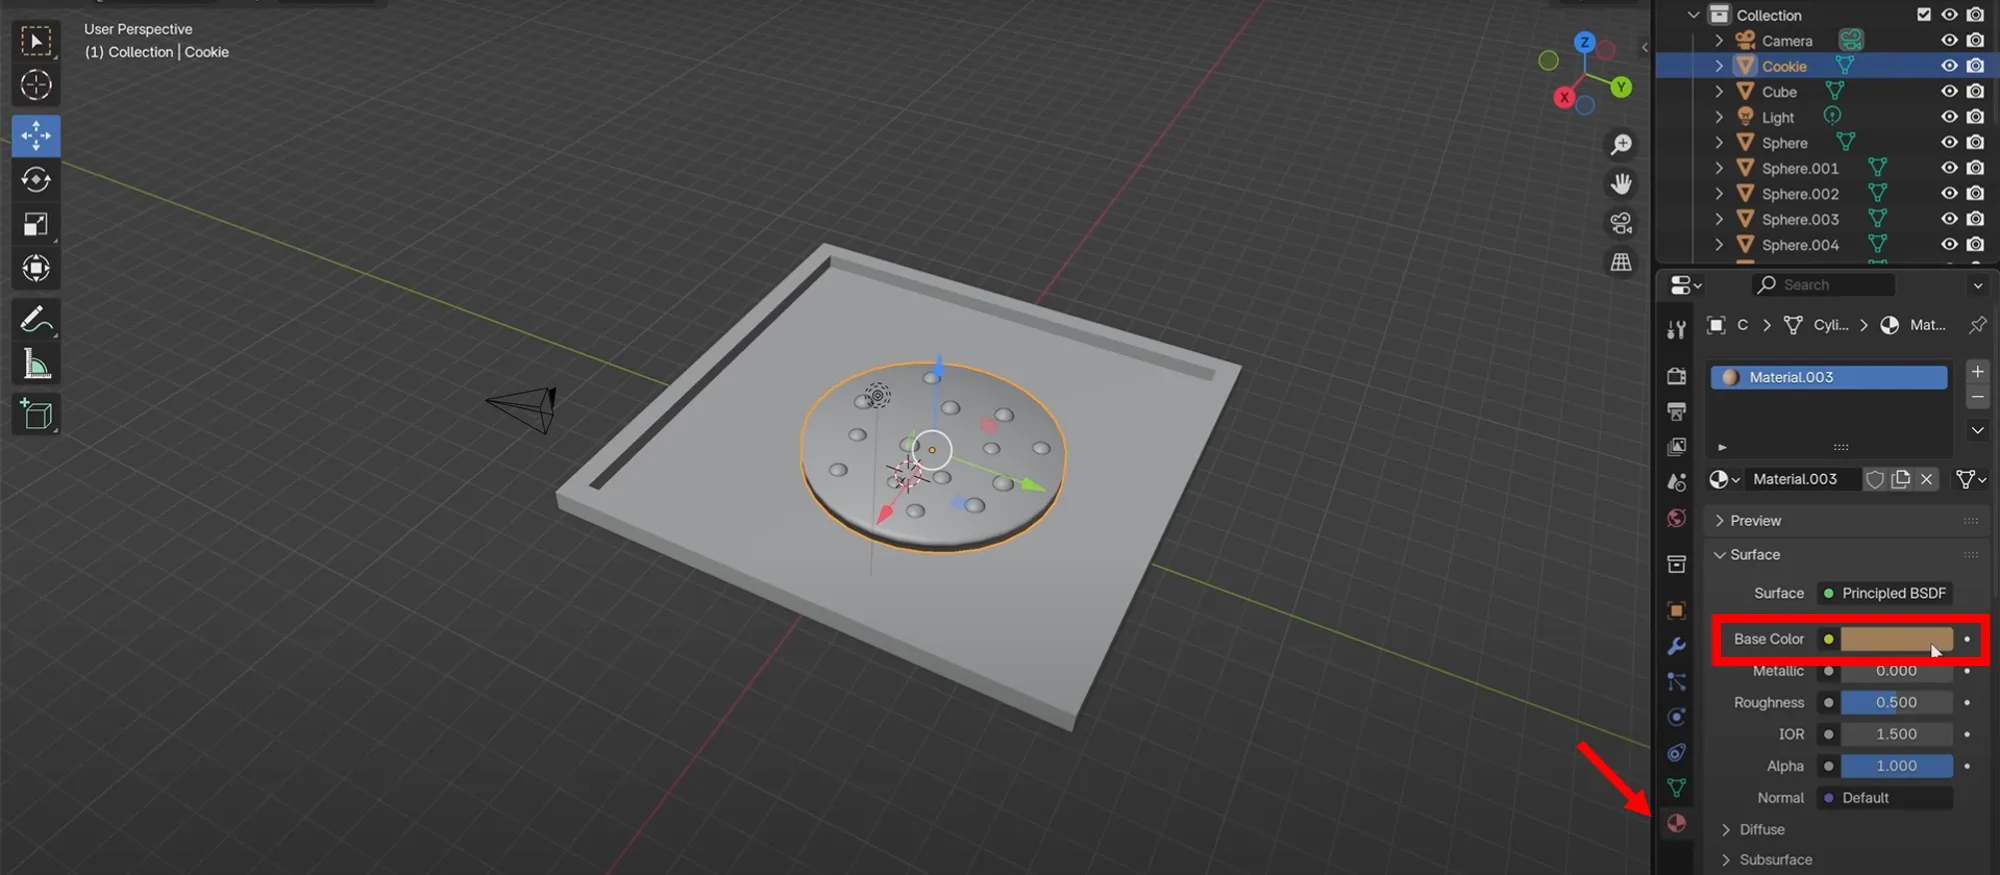
- Add material in Material Properties →
New - Choose Base Color for cookie, chips, and tray
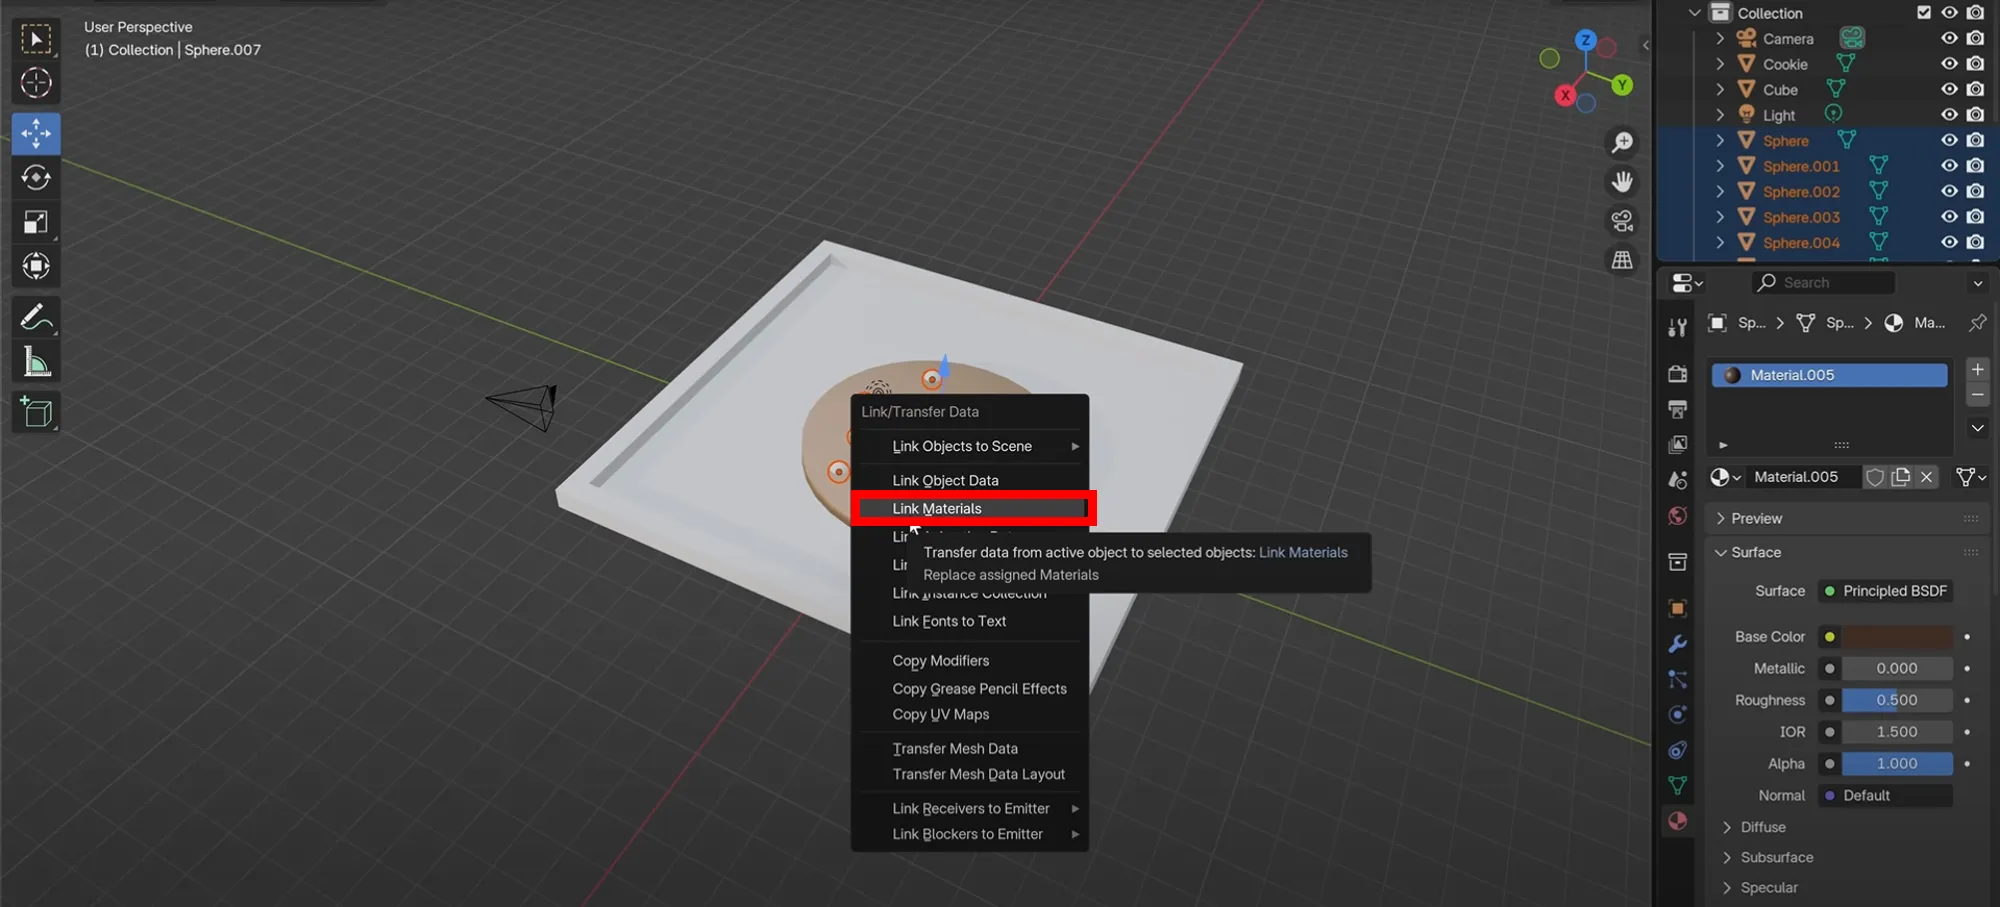
- To quickly assign the same material, select chips → last chip with material →
Ctrl + L > Materials
5. Lighting & Rendering

- Click Viewport Shading: Rendered
- Delete default light → Add Area Light (
Shift + A > Light > Area)
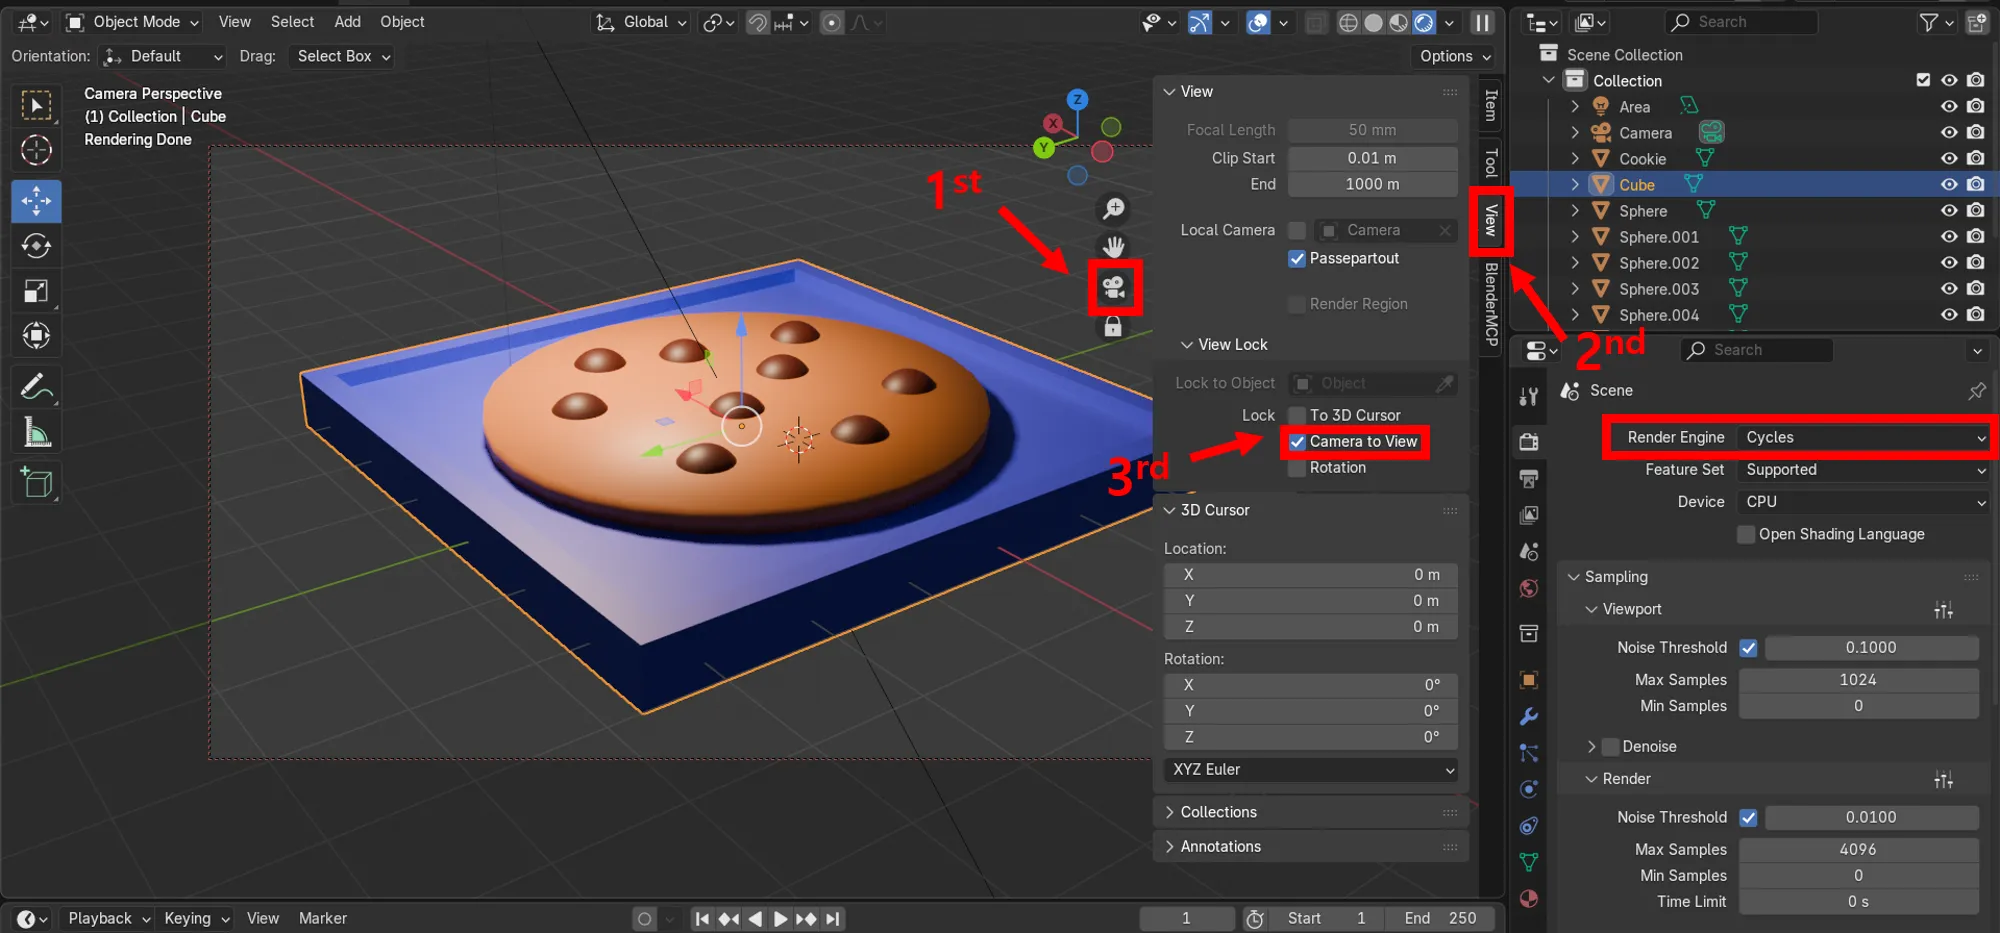
- Position camera (
0on numpad, enable Camera to View) - Set render engine to Cycles for realism
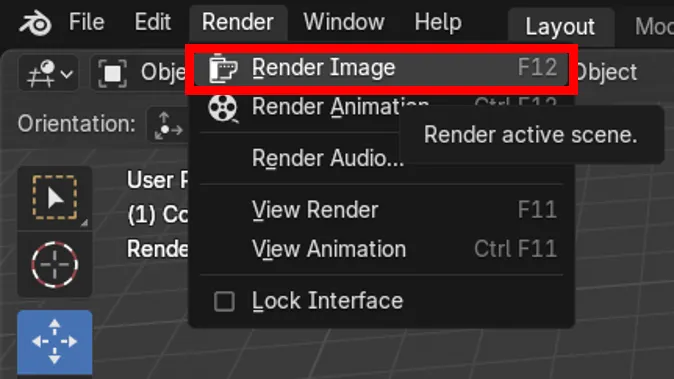
- Render with
F12→ Save viaImage > Save As
Tutorial 2: Blender Floor Plan Tutorial
This tutorial focused on combining objects and creating a full scene:
- Importing and scaling floor plan images
- Modeling floors and walls
- Applying materials, lighting, and render settings
1. Setup
- Download a floor plan image
- Open Blender, select all (
A) and delete (X) default objects Import image → Creates an Empty object
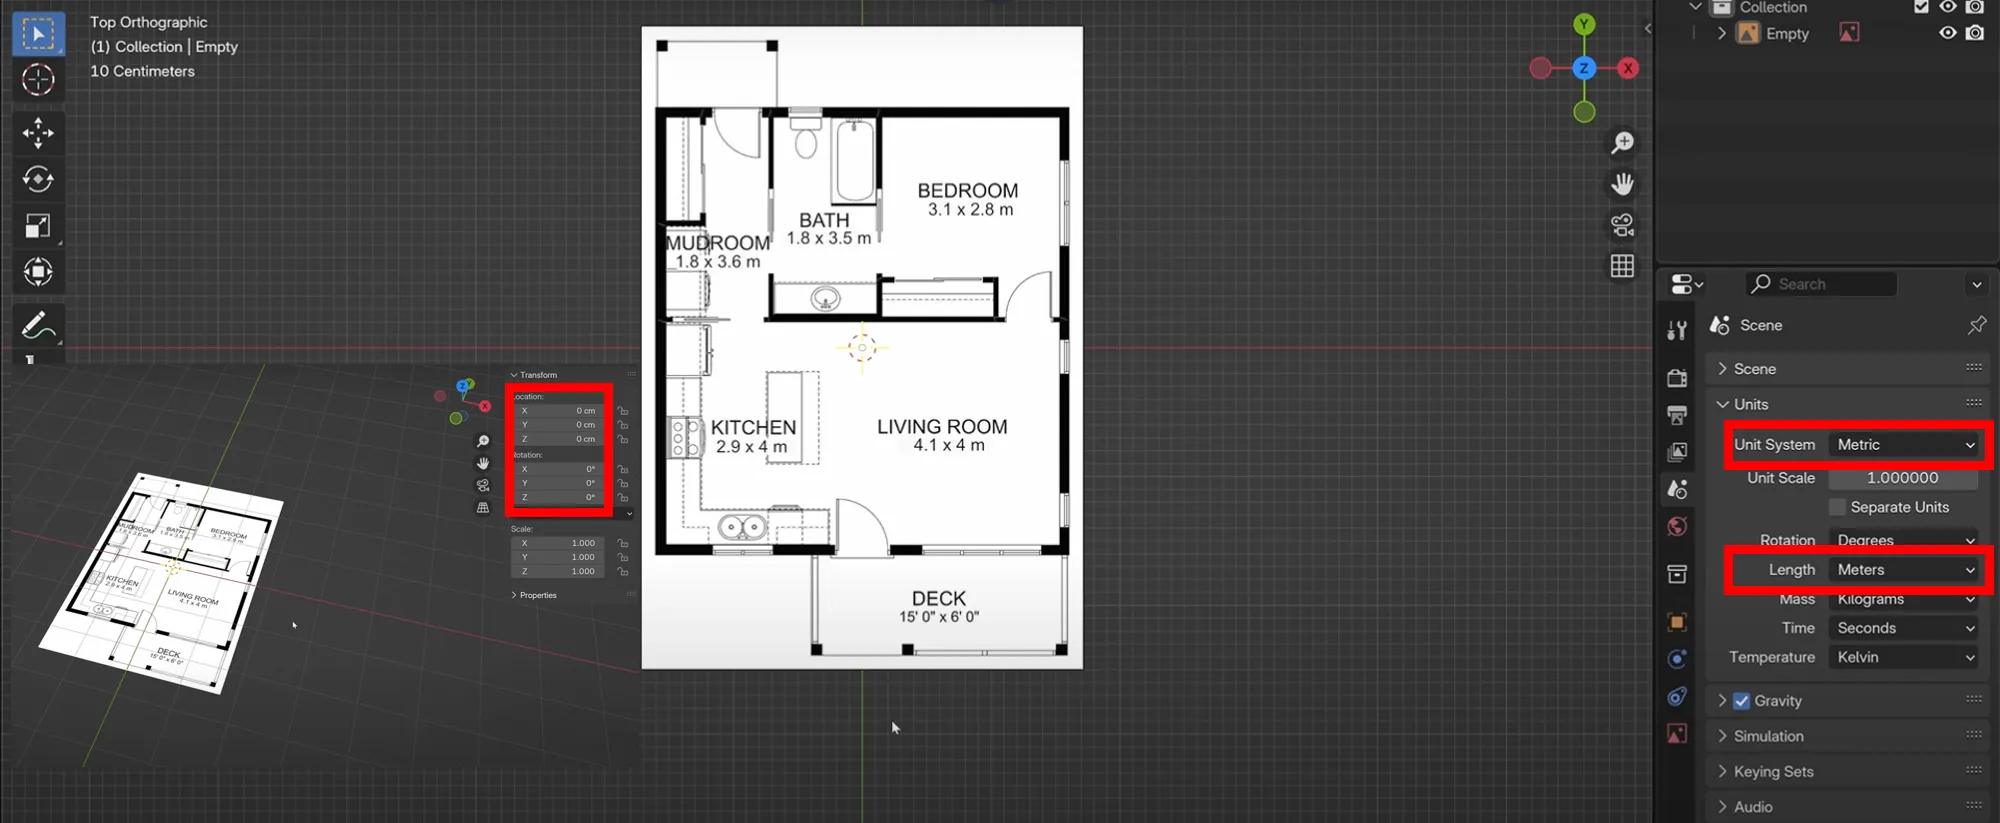
- Reset location & rotation:
Alt + G,Alt + R - Switch to Top Orthographic View (
7on numpad or click z in xyz) - Set Units to Metric (Scene Properties → Units → Metric → Meters)
2. Floor & Walls
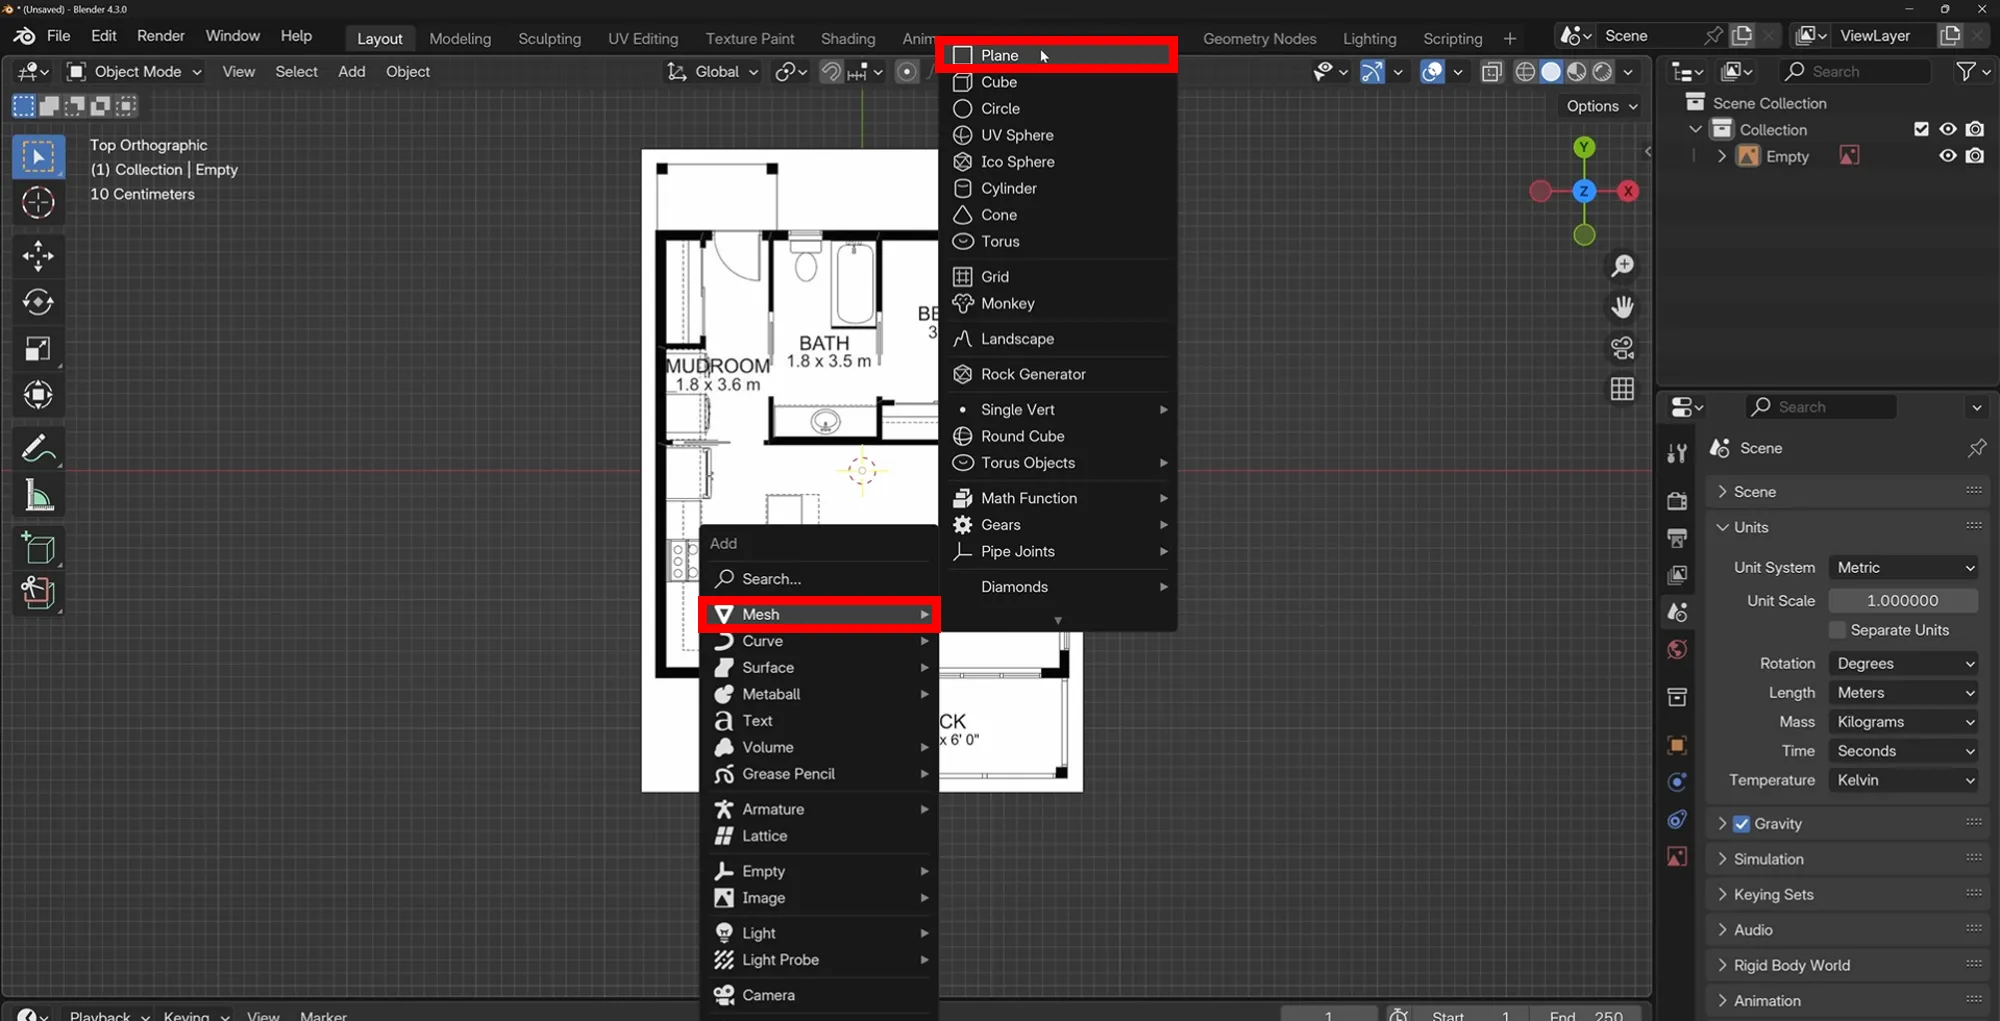
- Add Plane (
Shift + A > Mesh > Plane)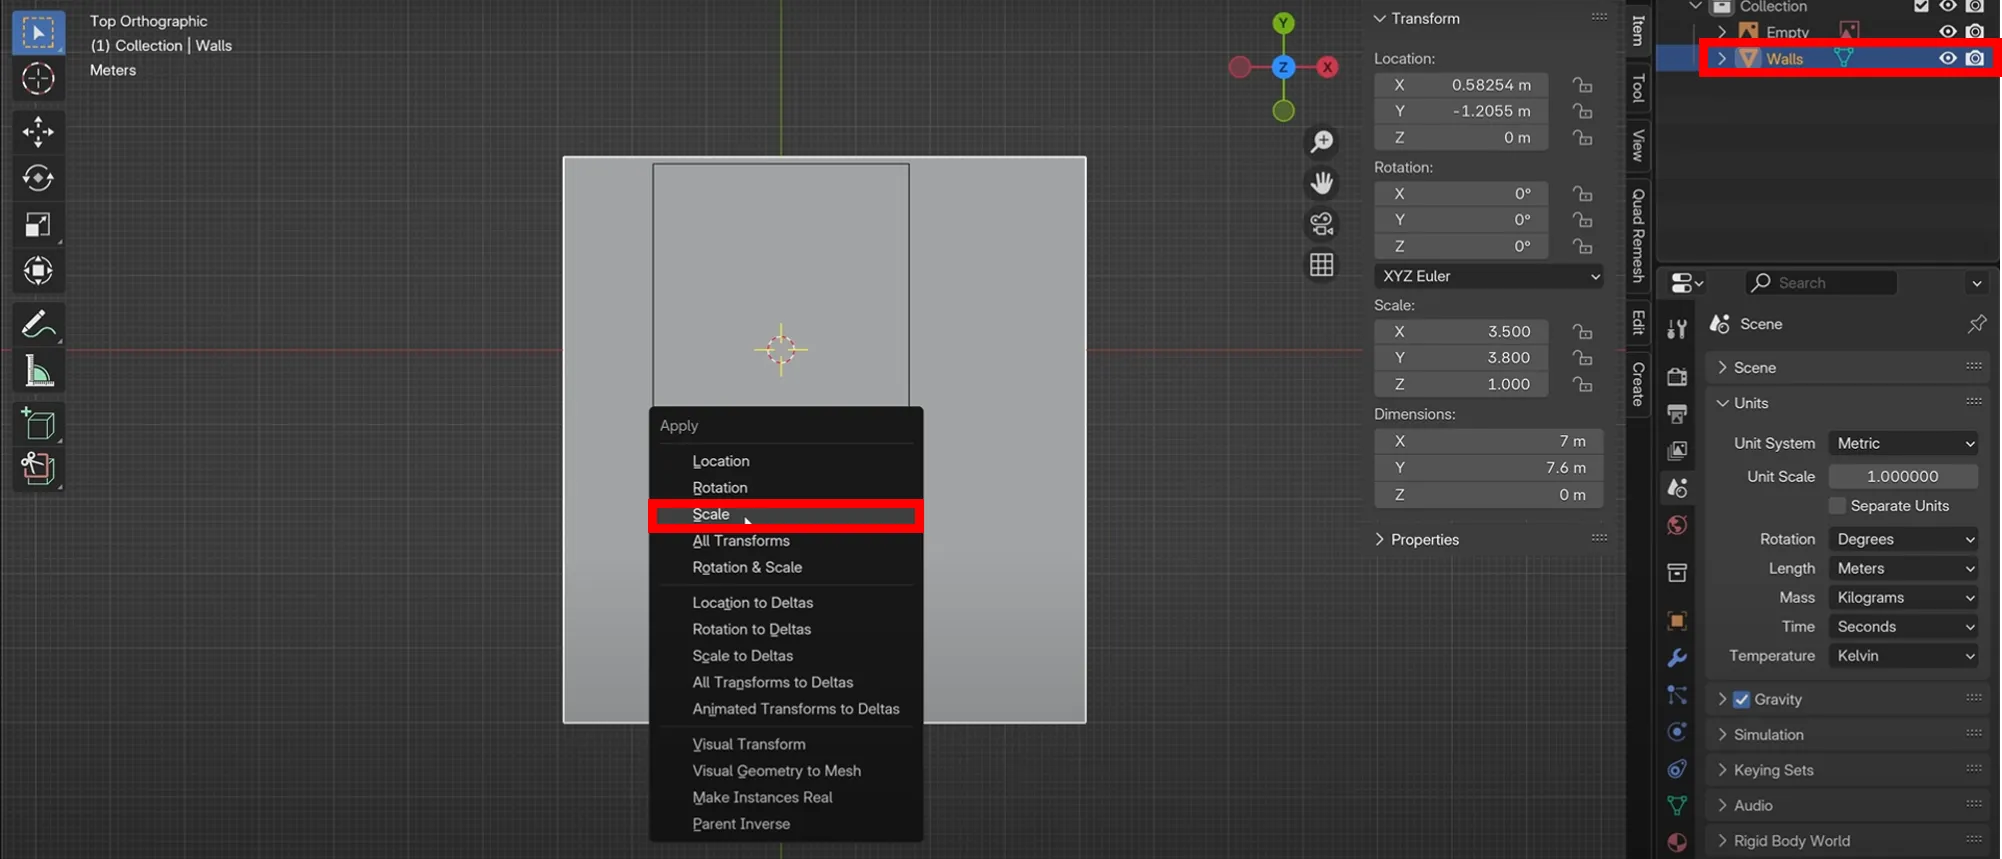
- Rename to Walls and set dimensions in Item Sidebar → Apply scale (
Ctrl + A > Scale)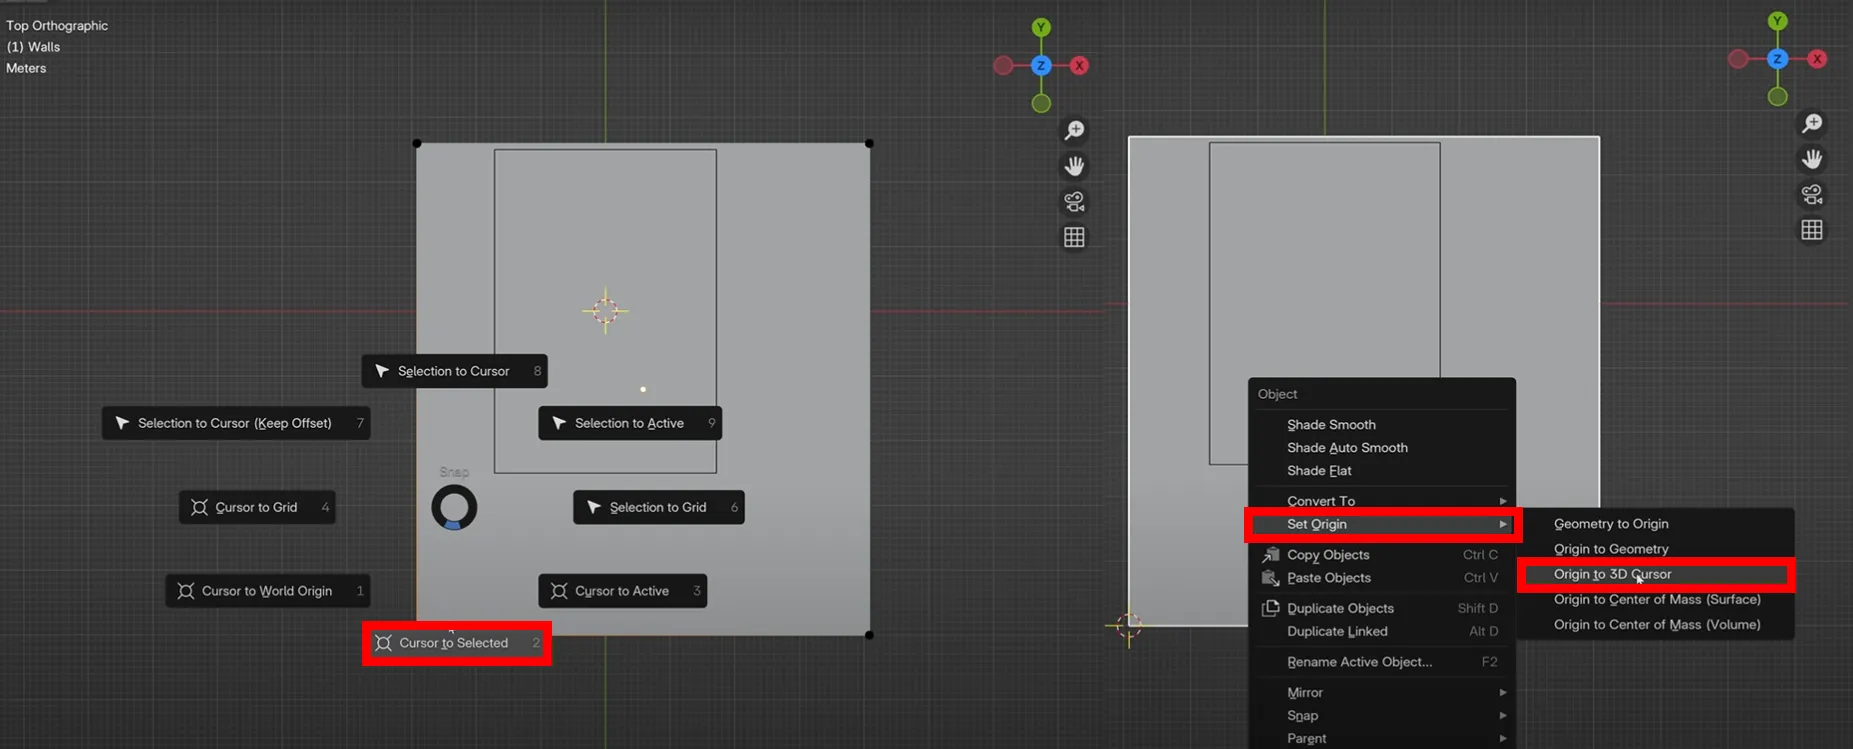
- Click
wallsand set origin (Shift + S > Cursor to Selected&Right Click > Set Origin > Origin to 3D Cursor) and clear any translation byAlt + G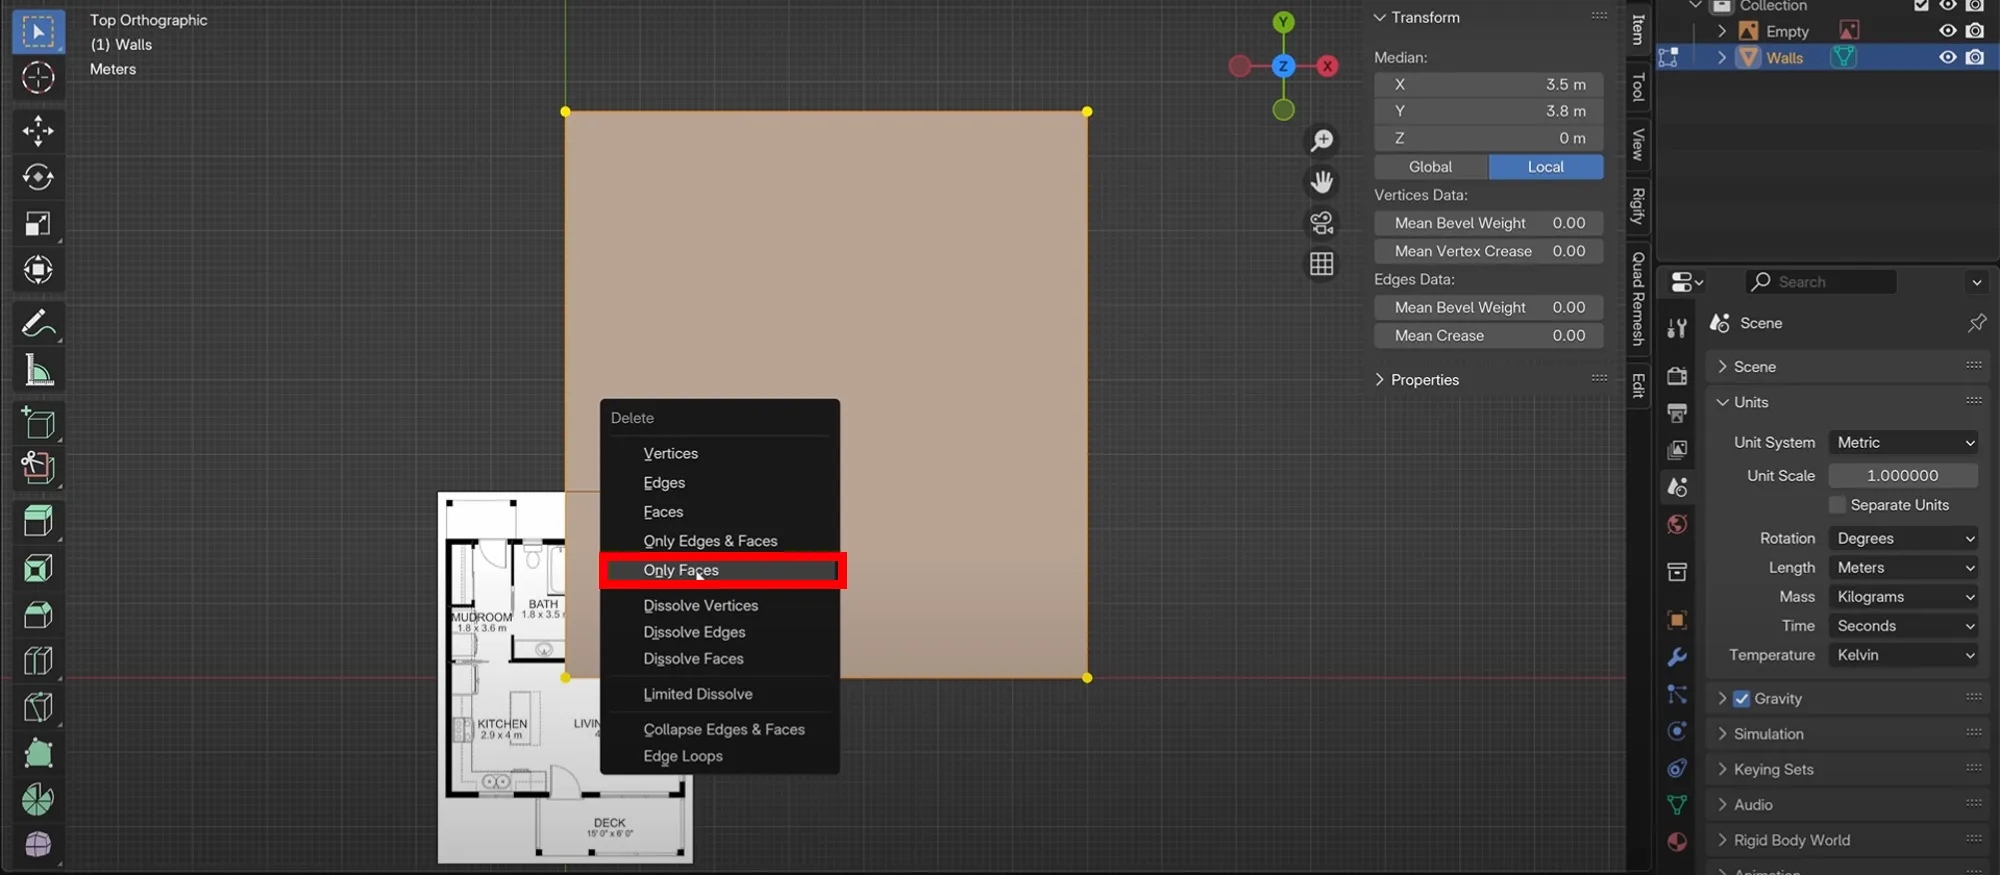
- In Edit Mode, delete face (
X > Only Faces) - In Object Mode, move the floor plan image fit right in the Wall line
- Delete three vertices in Walls (
X > Vertices) ![extrudevertices]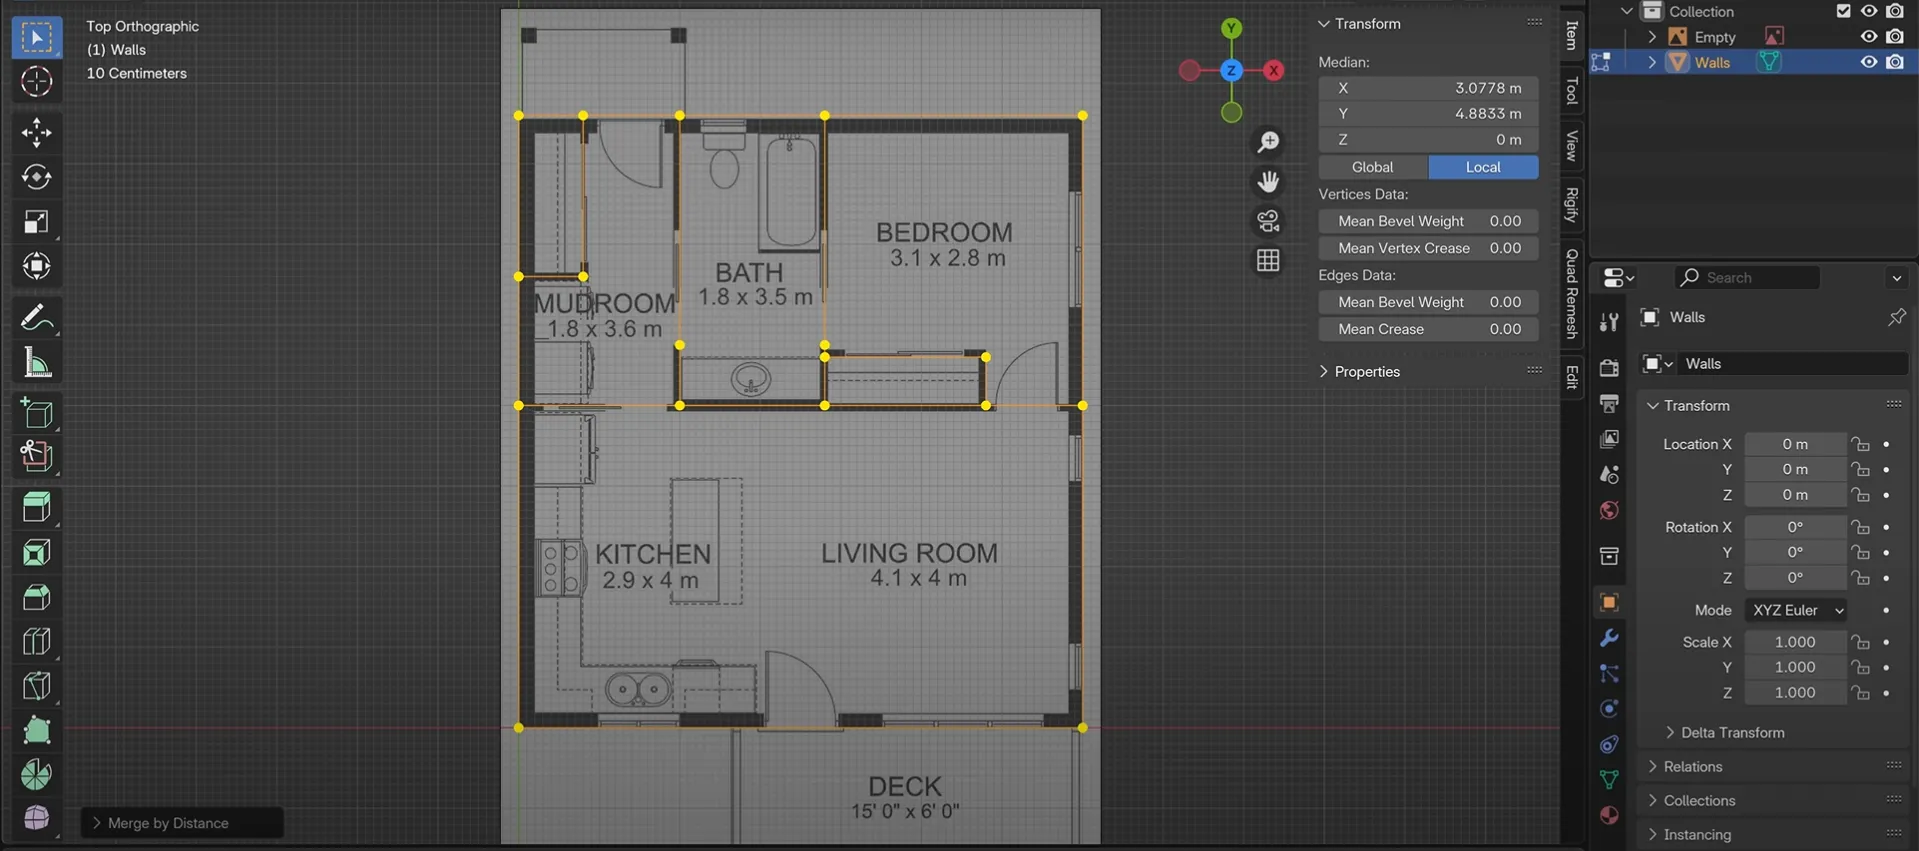
- In Edit Mode, extrude vertices (
E) along X/Y to match outer walls - Extrude inner walls for rooms too
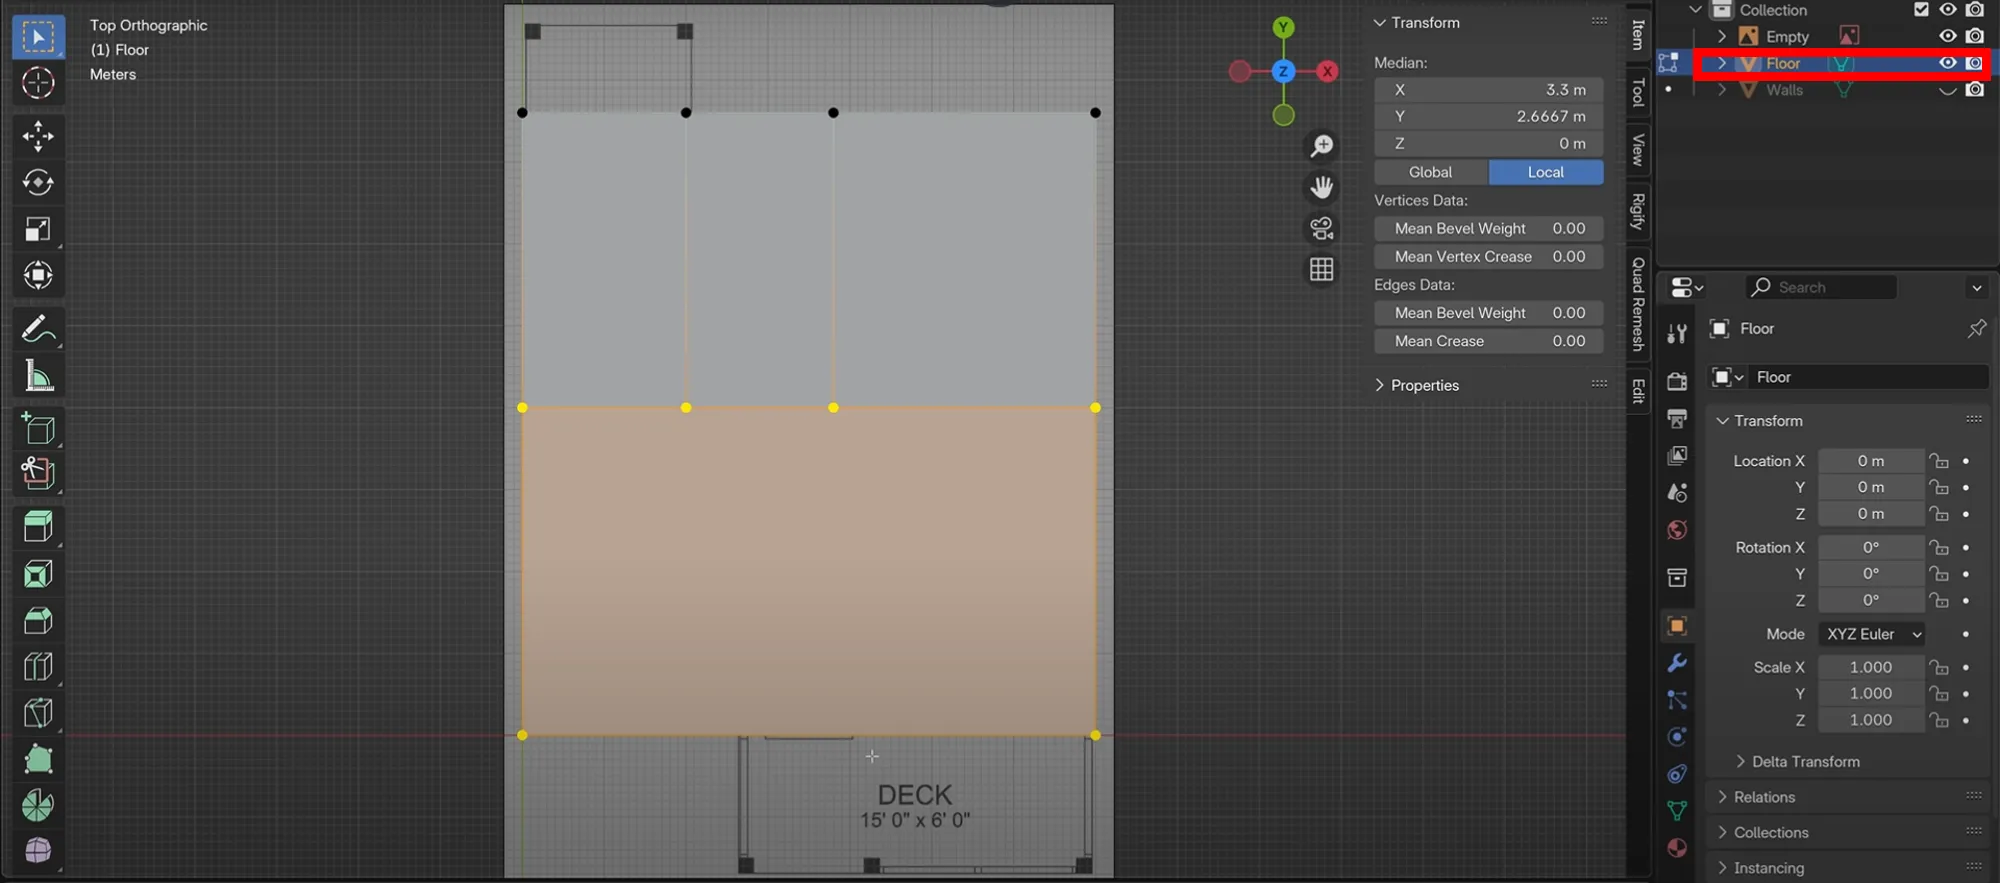
- Duplicate Walls and rename the duplicated one as Floor and hide the Walls by clicking eye icon
- For the same floor, delete some overlap unnecessary vertices
- For each room, select all of the vertices and make a face(
F).
3. Finalizing & Rendering
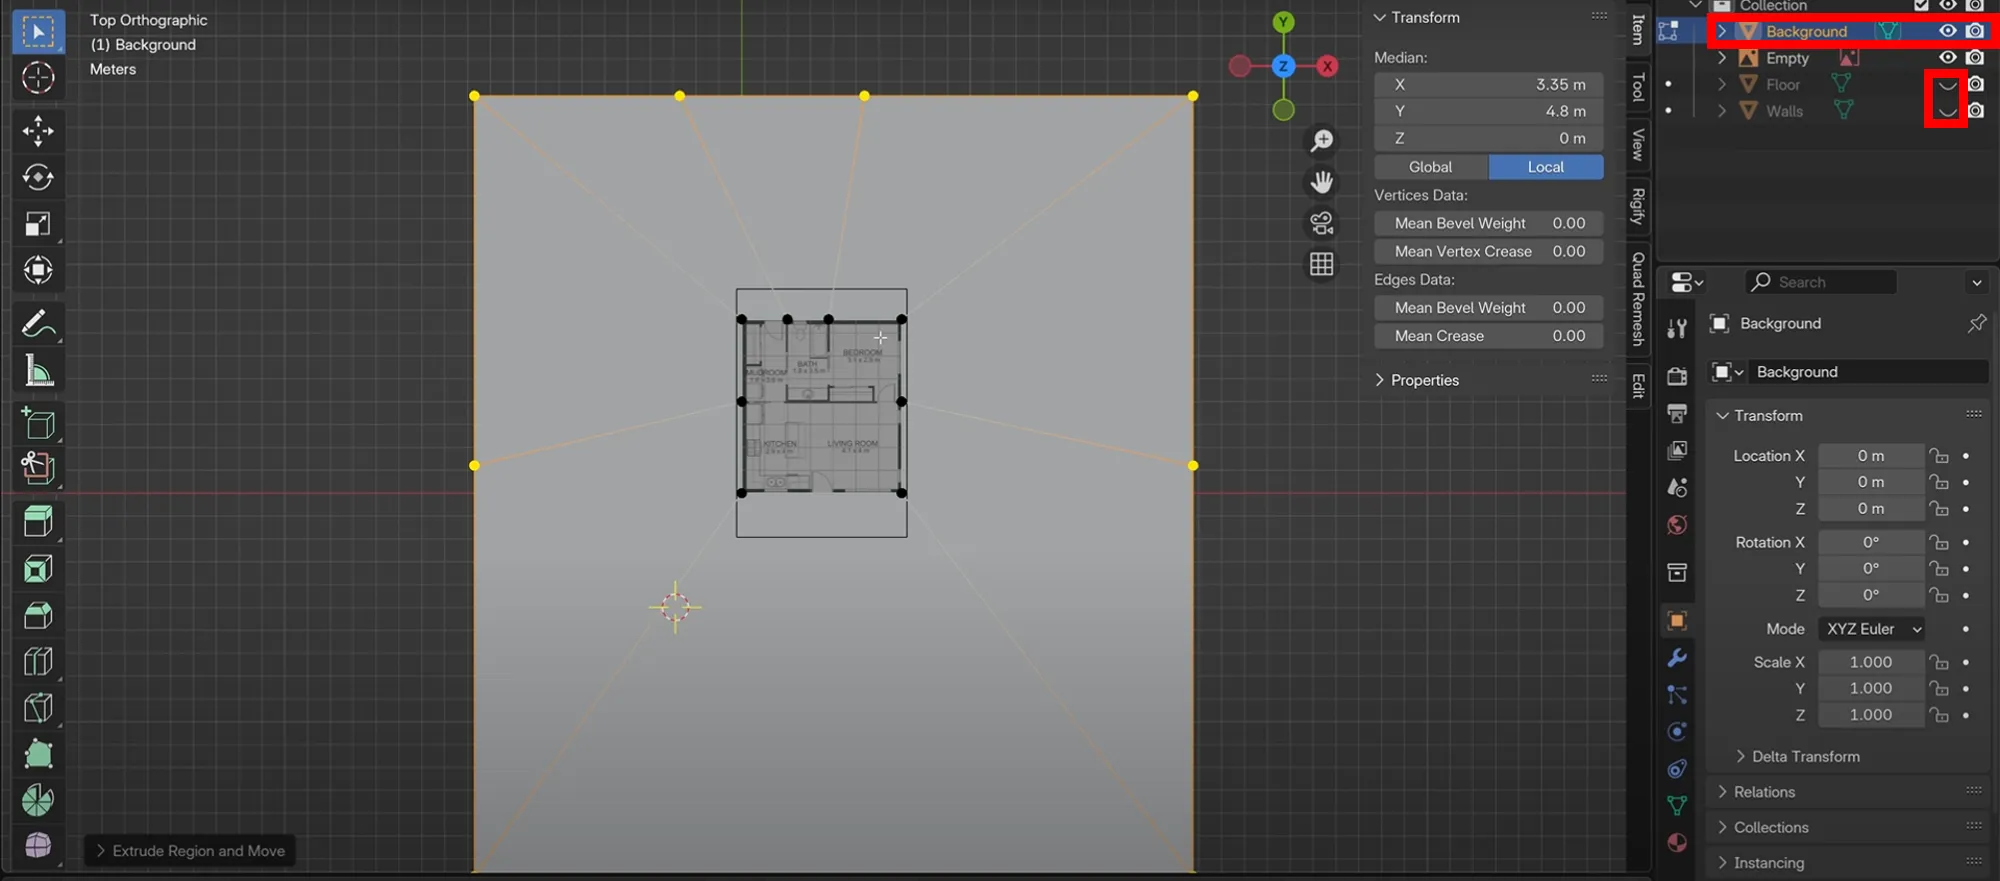
- Duplicate floor (
Shift + D > Right Click) and rename Background - Hide Floor and Walls
- In Background, delete all inner vertices
- Extrude everything and scale (
A > E > S)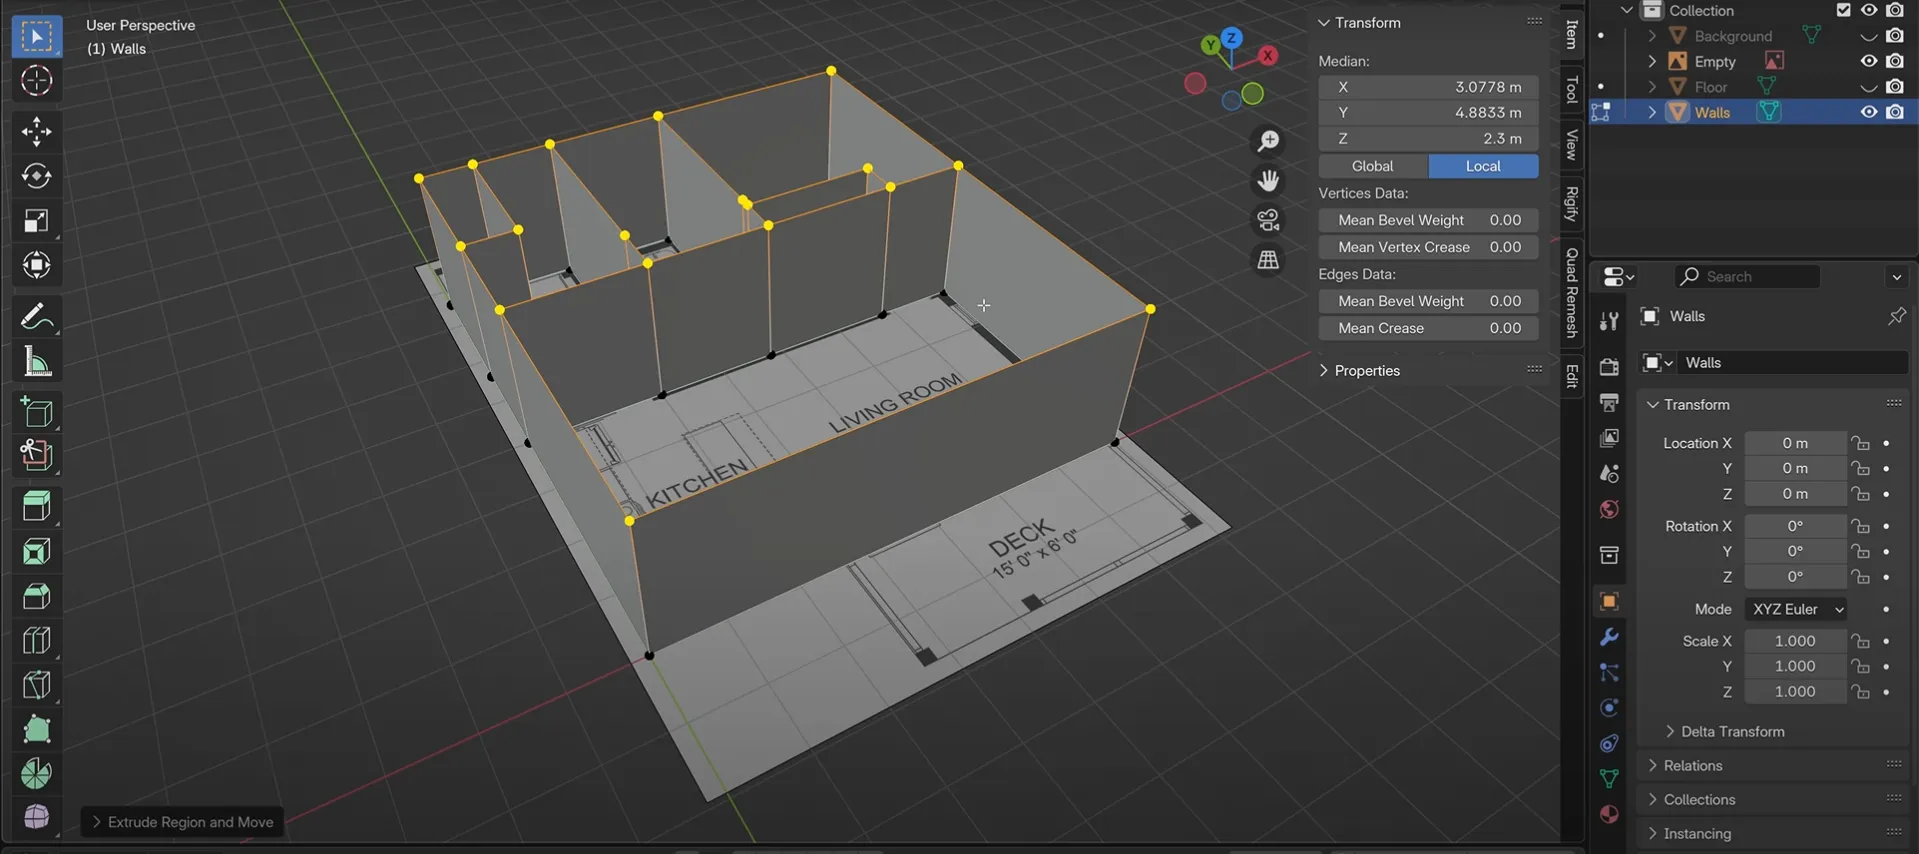
- Hide Floor and Background. Select Walls → Extrude upwards along Z-axis (
E > Z)
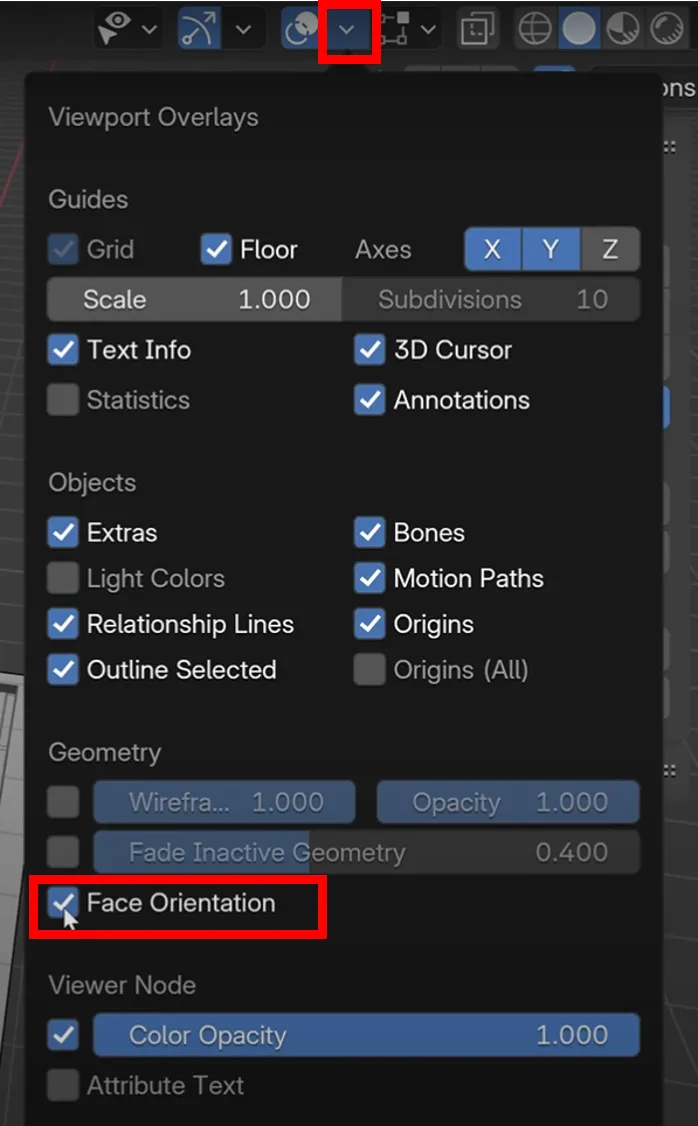
- See walls’ orientation (
Overlays menu > Face Orientation) Modifier.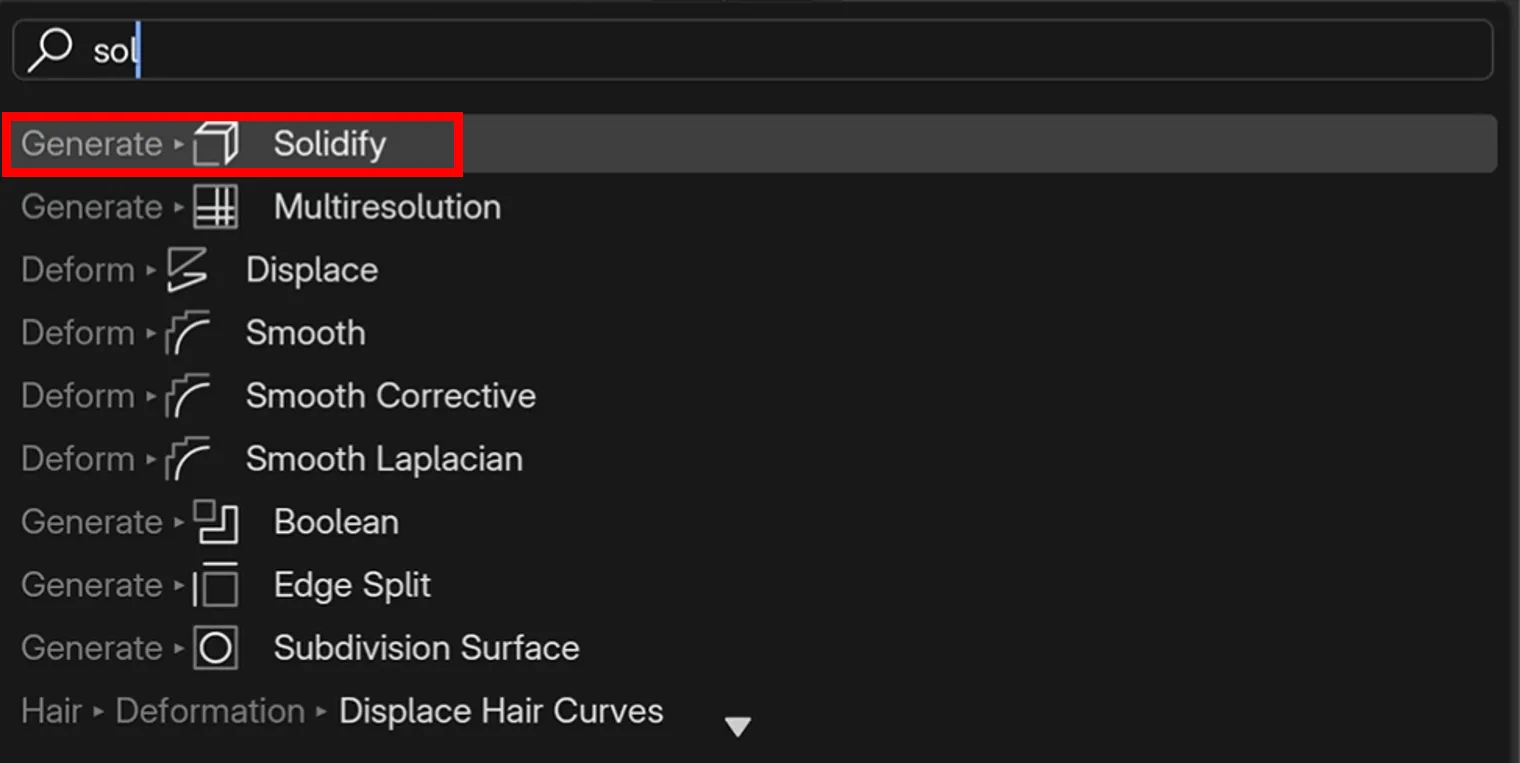
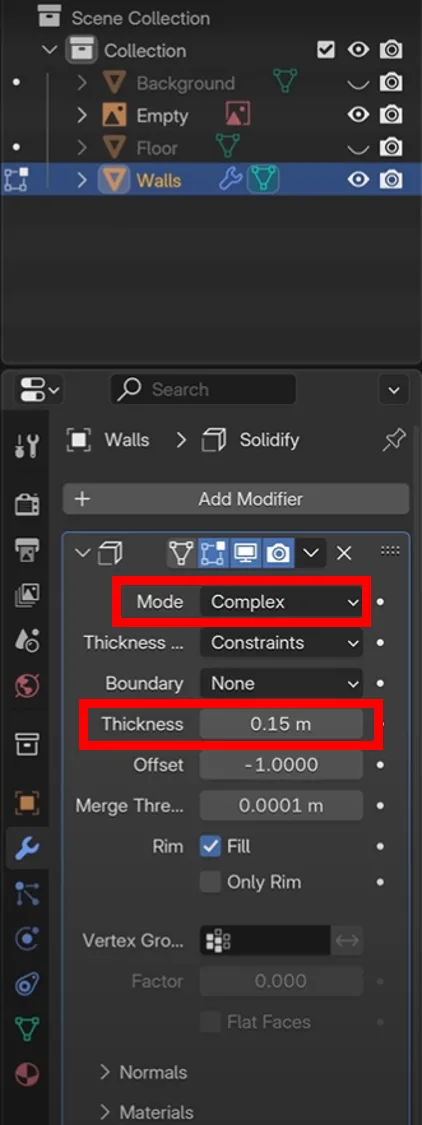
- Add Solidify Modifier (
Modifier > Add Modifier > Solidify) and change some settings (Mode Complex, Thickness) - Click Monitor Icon in Modifier
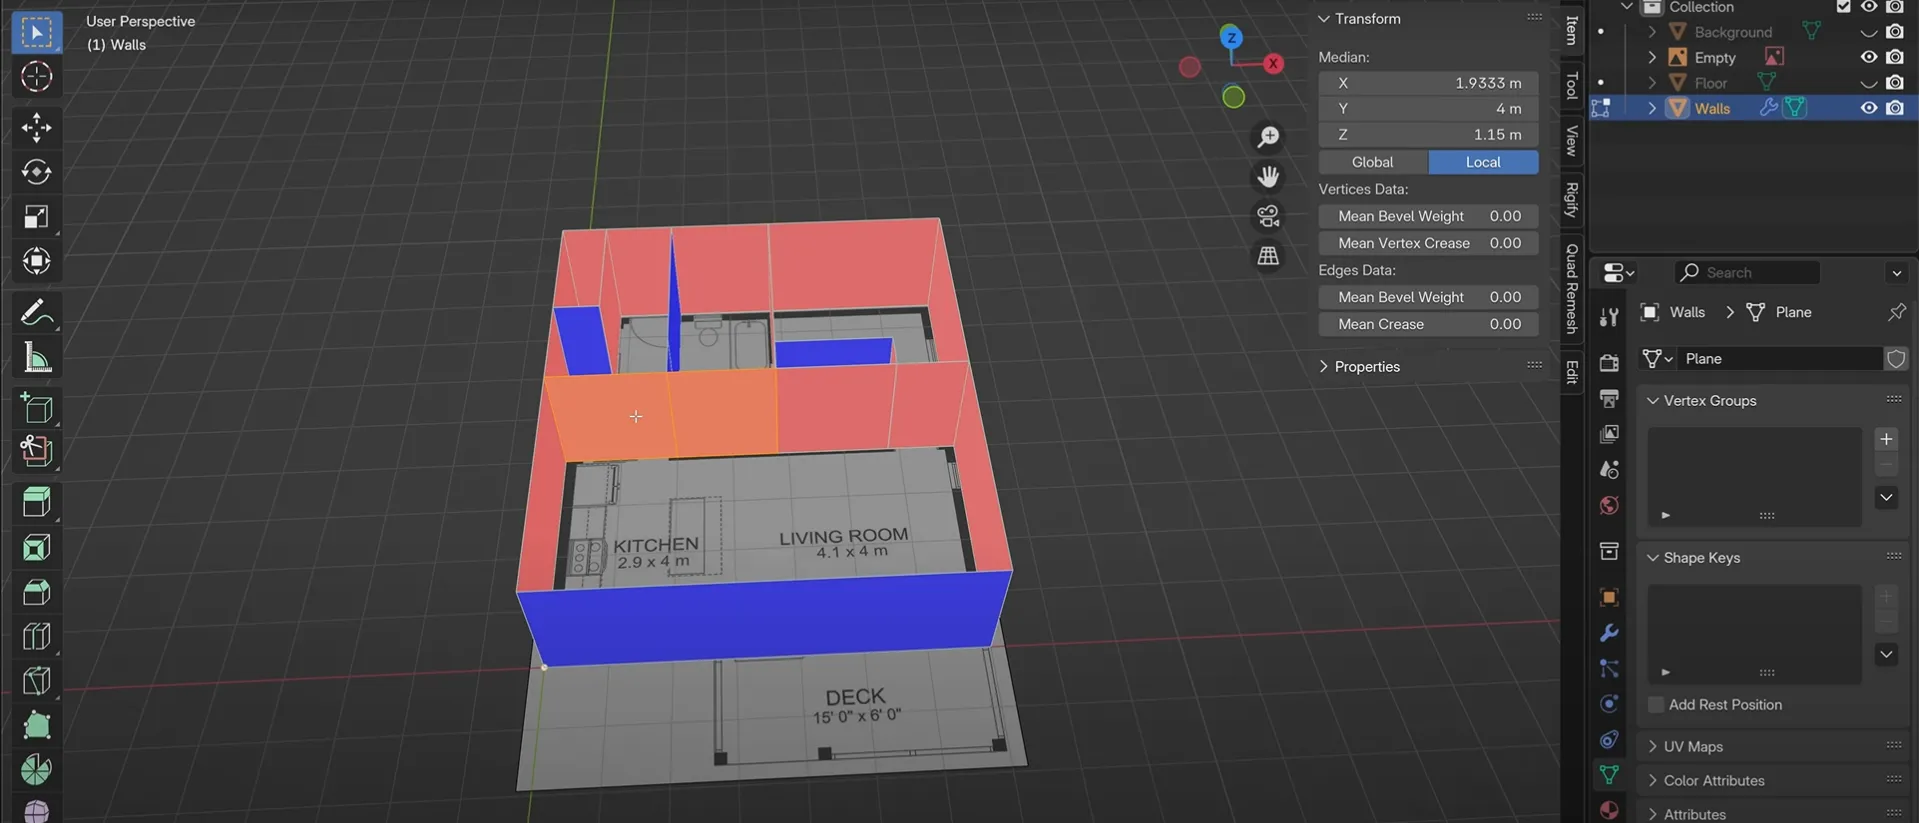
- Fix flipped faces (
Shift + N) (Blue = outter, Red = inner) - Click monitor icon again
- Orientation overlay off (
Overlays menu > Face Orientation)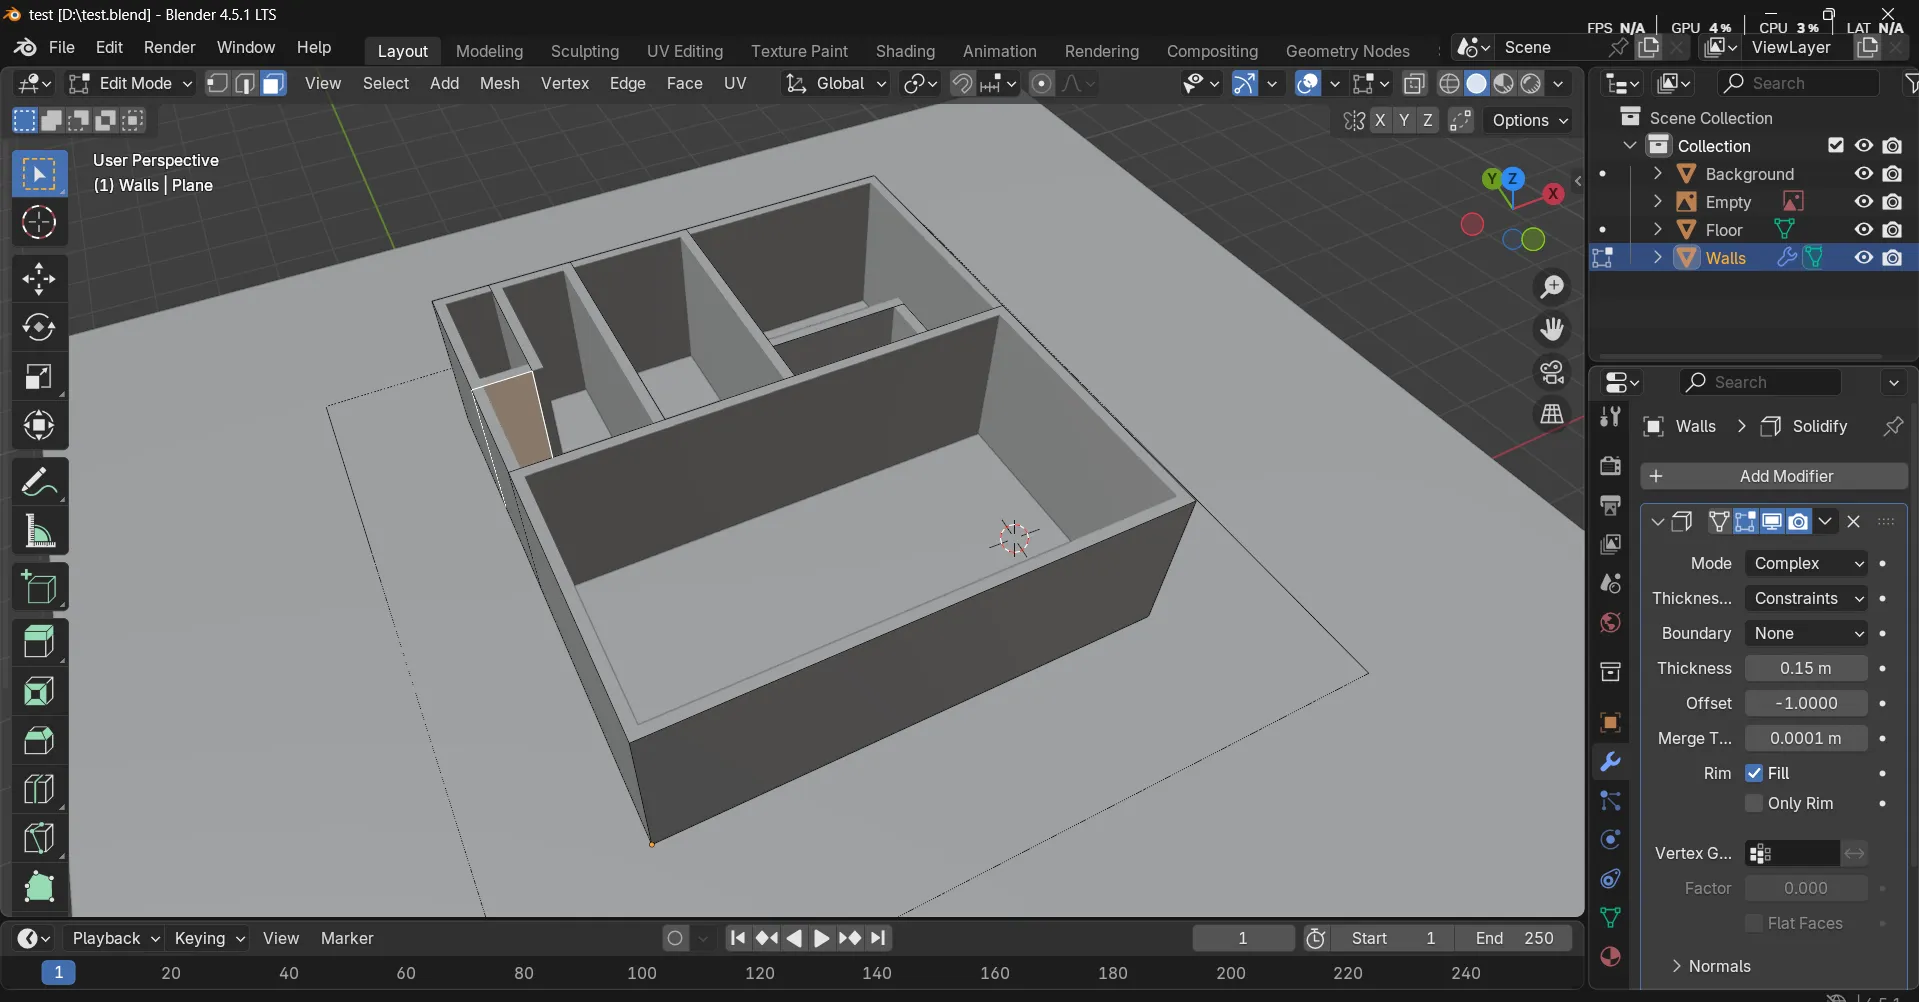
- Save your work (
Ctrl + S)
Summary
At the end of the day, it wasn’t just about a cookie or a floor plan. These tutorials taught me how to bring any idea to life in 3D. Modeling, texturing, lighting—once you get the hang of these, you’re ready for bigger projects, whether it’s games, architectural visualization, or AR. Honestly, seeing something I imagined appear on screen made me even more excited to dive into Unity. In 3D, the only limit really is your imagination.
💡 Final Tip: Always organize objects, name them clearly, and save iterations frequently. This keeps projects manageable as scenes get complex.